Rob’s Recipe of the Week: An End-of-Summer Soup
My housemate gave me this recipe (adapted from Gordon Ramsey) because he claimed it was the best soup he’s ever had. I overspiced my attempt so i’ll leave you to decide whether he’s right! I topped up my share with a friend’s garden tomatoes, but the recipe can be scaled down if you have less than is needed. I made 5 lunch sized portions from 1.2kg of tomatoes.
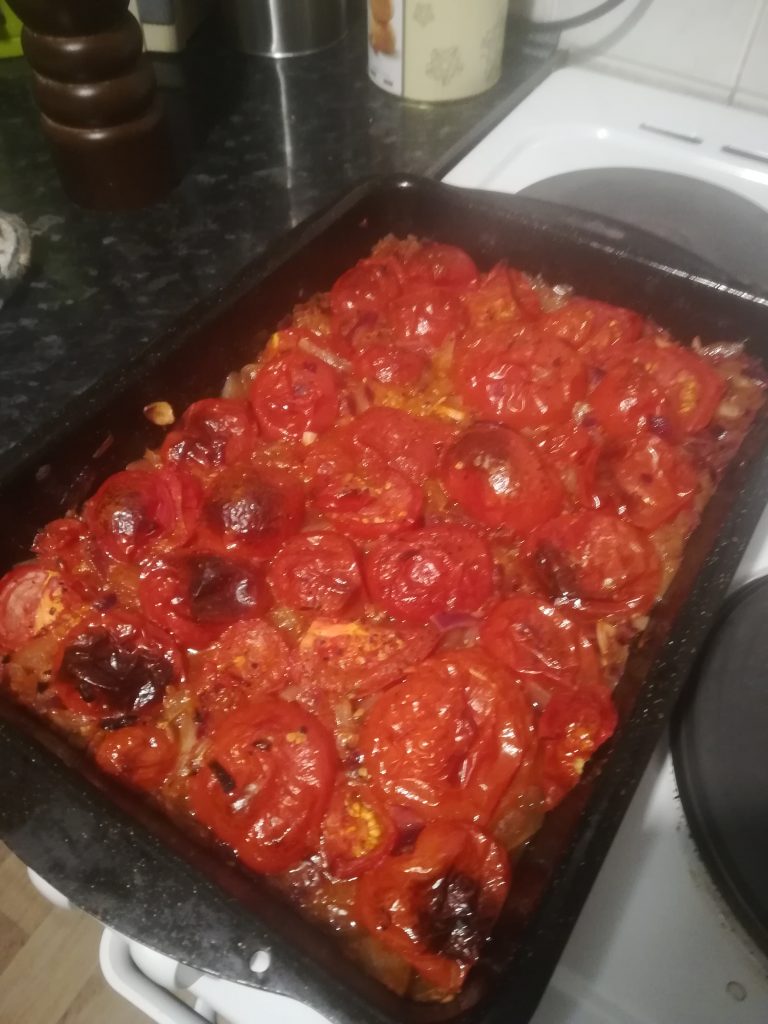
Roasting the tomatoes 
The finished soup!
Tomato soup with sundried tomato pesto
Ingredients:
SOUP:
2 red onions, peeled and sliced
2 garlic cloves, peeled and finely sliced
1⁄2–1 tsp cayenne pepper, to taste (1/2 makes for a spicy soup if you’re using CORE’s cayenne pepper!)
olive oil, for drizzling
1.5kg ripe tomatoes, cored and halved
sea salt and freshly ground black pepper
1 tsp caster sugar
1 tsp balsamic vinegar
1 litre vegetable or chicken stock
100ml double cream (soya alternative works fine)
PESTO:
2–3 tbsp pine nuts
75g sundried tomatoes, drained, oil reserved and finely chopped
50g Parmesan cheese, grated (welcome suggestions for vegan replacements, the cheese is the bulk of the pesto in this recipe so not sure you can manage without)
olive oil
Method:
Preheat oven to 180 degrees C.
Use a roasting tray on the hob at medium heat to brown the onions, garlic and pepper for a few minutes. Then add the tomatoes face down and move to high heat. Season with salt/pepper and add sugar and vinegar. Cook until tomatoes begin to caramelise (3-4 minutes). Stir and move to oven for 20-25 minutes. (If they blacken a little that’s fine, it adds to the flavour)
Make the pesto while you wait. Toast the pine nuts in a frying pan and using a pestle and mortar, pound the sundried tomatoes to a paste, season with salt and add the pine nuts, continuing to pound to resemble pesto. Stir in parmesan and add a good glug each of tomato oil and olive oil to make it look like pesto again.
Get the tomatoes out and back on the hob, adding the stock and simmering for 4-5 minutes. Then add the cream for 2-3 minutes stirring well. Then blend and serve with dollops of pesto on top!
Rob’s Recipe of the Week: Road trip pasta
This week I’m keeping it simple and taking a little inspiration from a recent roadtrip to Italy. The spinach and tomato are pretty core to the dish but feel free to pick and choose from the rest of the list depending what you’ve got – I use an app called plant jammer to figure out what things might go well together.
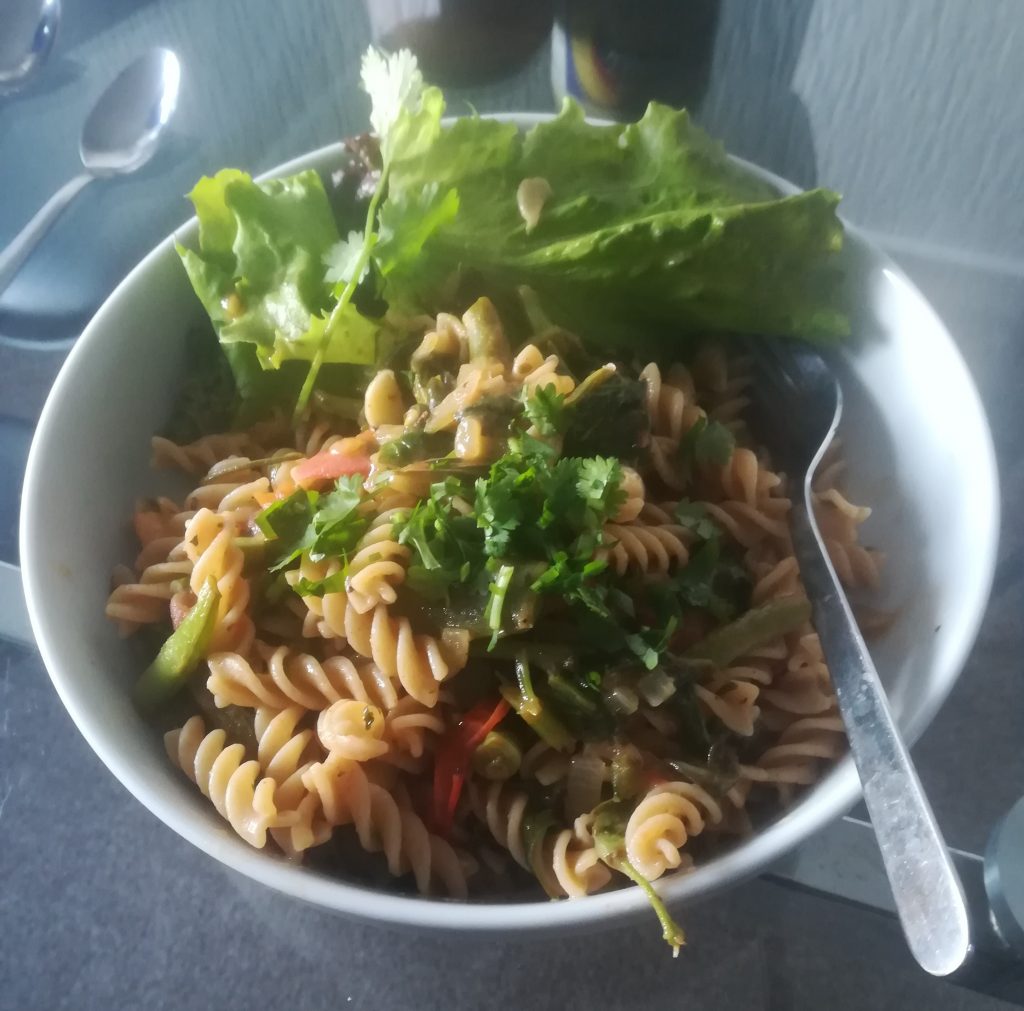
Core Ingredients (for 1 person):
Pasta of your choice, 2 handfuls
Fresh Tomatoes, 1 large handful
Spinach (or other greens depending on share), 3 handfuls
Basil, small handful
Garlic, 1 clove
Lemon Juice 0.5-1 tablespoon or to taste
Olive Oil, 2-3 tablespoons or to taste
Mixed herbs, 1 teaspoon
Optional extras:
Black olives, small handful
Walnuts, small handful
Onion, 1 medium
Green/French Beans, about 3cm bundle
Method:
First chop all your veg; tomatoes into quarters, spinach may need stems chopping down to manageable size, garlic minced or thin slices, onion diced
Next get the pasta on the boil – when it’s ready remember to keep the water!
Whilst the pasta cooks, fry off onion and garlic, then add tomatoes, spinach and any optional extras and fry at a medium heat.
The pasta should be ready about the same time as the veg is cooked. Before draining, add the olive oil to the veg and then add a few sloshes of the pasta water – the starch helps make a good sauce! Then add the lemon juice, basil and mixed herbs and stir it all together until you have a nice shiny consistent sauce. Season with salt and pepper.
Drain the Pasta and add to the pan, mix and serve with some salad on the side and a little chopped coriander on top.
Rob’s Recipe of the Week: Vegan ‘omelette’ for filling
I picked up this recipe whilst living in Gothenburg and it has great connotations for me with sunny breakfasts on the pier… Hopefully I don’t just see it with rose tinted glasses!
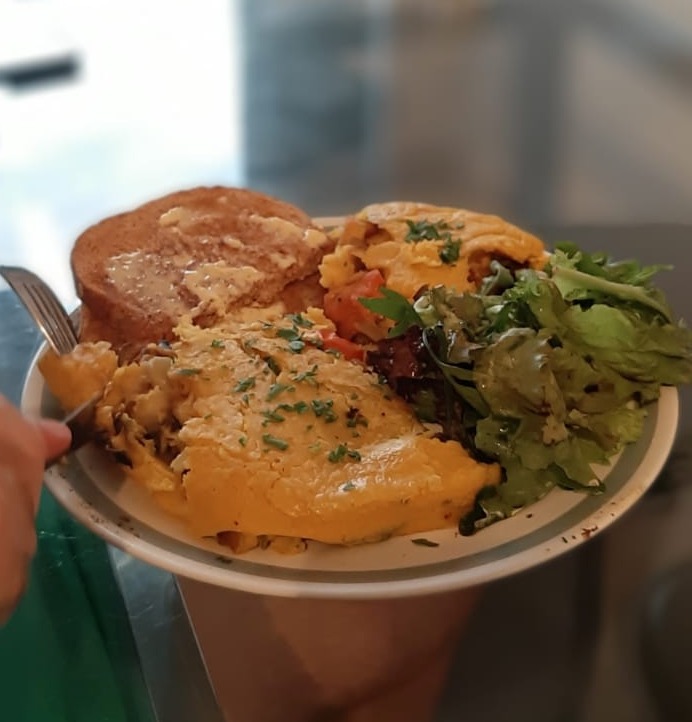
Vegan chickpea flour (kikärtsmjöl) omelette
Ingredients
1 cup (120 g) chickpea flour
1 Tablespoon flaxseed meal or chia seed meal (optional)
1/2 tsp (0.5 tsp) salt
1/4 tsp (0.25 tsp) each of turmeric garlic powder, baking soda, cumin powder
1ish cup of water
Fillings!
Fried tomato, onion, mushrooms, lots coming in our shares that could suit!
Method is simple, mix the all the dry ingredients then add the water slowly and mix with a whisk until they take on the same consistency as whisked eggs. Fry up the fillings, then poor on the omelette mix and reduce pan to a medium to low heat. Make sure you cook it slower and longer than an egg omelette – it tends to burn before solidifying enough to flip if you rush it.
Rebecca’s Recipe of the Week: Green Beans, Tomatoes and Saffron
Serve this lovely blend of tomatoes, beans and saffron-scented onions as a side dish, or alongside some polenta topped with a poached egg. It’s also tasty accompanying plain white fish.
Fagiolini in umido all zafferano
Serves 4 as a side dish.
Ingredients
10 medium tomatoes
60ml olive oil
2 medium onions, peeled and thinly sliced
1 small pinch of saffron
650g green beans, topped and tailed
Preparation
Bring a medium pot of water to the boil. Prepare a bowl of ice water.
Score the bottom of each tomato with a X, using a sharp knife, and remove the core. Drop the tomatoes into the boiling water a few at a time, and cook for about 30 seconds each, until the skin starts to loosen. Remove with a slotted spoon and drop into the bowl of ice water. Don’t discard the hot water: you’ll use it to cook the beans.
Fish each tomato out of the ice water and slip off the skin. Dice into small cubes.
Put the olive oil and sliced onions into a saucepan over very low heat. Add a pinch of salt and the saffron. Cook gently for 20-25 minutes, or until the onions are soft and translucent. Stir occasionally and make sure they don’t catch or burn.
Add the diced tomatoes and cook for 10 more minutes. Season with salt.
Bring the tomato water to a boil, salt, and cook the beans for 6 minutes, or until tender. Drain the beans and add to the onion-saffron-tomatoes. Simmer for 3 more minutes over low heat and serve.
Recipe adapted from Christopher Boswell and Elena Goldblatt, Verdure: Vegetable Recipes from the American Academy in Rome (2014).
Rob’s Recipe of the Week: Courgetti – why notti?
I’ve never tried this but my girlfriend assures me it’s a great summer recipe and a slightly different way to make use of courgette!
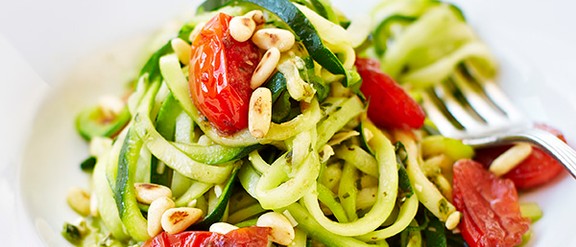
Courgetti with pesto and balsamic tomatoes
Ingredients
baby plum tomatoes 8, 4 halved and 4 whole
olive oil
garlic 1/2 clove, crushed
balsamic vinegar 1 tbsp
courgette 1 large, spiralised or very thinly shredded into noodles
fresh vegetarian pesto 2 tbsp
pine nuts 1 tbsp, toasted
Method
STEP 1: Toss the tomatoes with 1 tsp oil, garlic and balsamic vinegar and some seasoning. Tip into a frying pan and cook for 5 minutes until the whole tomatoes start to burst and they are coated in the balsamic.
STEP 2: Pour a kettle of hot water over the courgette spaghetti and blanch for 30 seconds. Drain really well, toss with the pesto and season well. Stir, coating the noodles, then add the tomatoes and toasted pine nuts to serve your courgetti.
From Olive Magazine
Ali’s Recipe of the Week: One for the Store-cupboard
Rebecca’s having a break this week and hopes to be back with another recipe next week.
With the cauliflower crop getting going, the moment may have arrived to do the first preserving of the year (that is, if you haven’t already made marmalade, perhaps using some delicious La Jimena seville oranges).
Piccalilli is as versatile as any savoury preserve in that you can flex the recipe according to what is available. Most piccalilli recipes call for courgettes, green beans, tomatoes, and other summer veg. However, if all you have is roots and PSB (purple sprouting broccoli) that combination will also make a perfectly good version of this tangy preserve. Luckily my book of preserves from the Women’s Institute can oblige with a suitably flexible recipe for any time of year! I’ve been know to make a version with cauliflower, onions (admittedly these are perhaps the two essential vegetables), carrot and swede!
Many piccalilli recipes call for the vegetables to be brined overnight, but this one breaks that rule, which simplifies the recipe and results in a delicious accompaniment for a ploughman’s lunch. And unlike chutneys which rely on evaporation of the liquid to thicken the preserve (which can sometimes take hours), as this one is thickened with flour it has a much shorter cooking time.
Accommodating Piccalilli from the W.I.
Makes about 2.7kg (6lb) = 6 average sized jam jars
Preparation time: 45 minutes
Cooking time: 30 minutes
Ingredients
1 large cauliflower, broken into florets
450g (1lb) pickling onions – if you’ve still got any little Canalside onions left, they’d be perfect!
1.4L (2 1/2 pints) white malt vinegar (apple cider vinegar also works well)
900g (2lb) mixed vegetables, diced or cut into 2.5cm (1 inch) lengths
2 fat cloves of garlic
450g (1lb) caster sugar
50g (2oz) dry mustard (i.e. mustard powder)
115g (4oz) plain white flour, sieved
25g (1oz) ground turmeric
1 tsp ground coriander
2 tsp salt
Preparation
In a large preserving pan, summer the cauliflower and onions in 1.1litres (2 pints) of the vinegar for 10 minutes.
Add the other vegetables, garlic and sugar and cook for a further 10 minutes.
Mix the mustard, flour. spices and salt with the remaining vinegar and add to the cooked vegetables, stirring all the time to prevent lumps from forming.
Stir well and simmer for a further 10 minutes.
Spoon into cooled and sterilised jars and cover with vinegar proof tops. Label and store for at least 2 weeks before using. It will keep for months (I think I’ve even kept it for more than a year) with the flavour improving and mellowing as it ages.
From ‘Best Kept Secrets of the Women’s Institute: Jams, Pickles and Preserves’ by Midge Thomas
Rebecca’s Recipe of the Week: Diana Henry’s Uzbeki Carrots
Carrots simmered in warm spices with dried fruit, topped with pistachio nuts and salty yoghurt. You will enjoy this. I served it with a surprisingly complex beetroot salad dressed with balsamic vinegar and maple syrup, mixed with shredded daikon radish, a root-vegetable hat trick, but that’s for another day.
The recipe calls for 1 tablespoon of barberries, which, amazingly, I happened to have. I think you can leave it out. You could also serve this over pasta, or in a pita with a shredded hard-cooked egg.
Uzbeki Carrots
Serves 2-3.
Ingredients
3 tablespoons olive oil
1 onion, thinly sliced
2 tomatoes, cut into thin wedges (or several tinned tomatoes)
4 garlic cloves, finely chopped
½ Canalside chile, seeded and shredded (or to taste)
¼ teaspoon ground cinnamon
½ teaspoon ground cumin
salt and black pepper
500g carrots, peeled and cut into batons
75g currants
1 tablespoon dried barberries (entirely optional)
¼ teaspoon saffron
350ml water (or use some of the tomato juice from the tin if you’ve used tinned tomatoes)
1 tablespoon tomato paste
2 teaspoons honey, or to taste
To serve:
2-3 tablespoons shelled unsalted pistachios, coarsely chopped
Salted yoghurt
Fresh coriander, chopped
4 spring onions, sliced
Preparation
Heat the oil in a large saucepan and sauté the onion over medium heat until golden brown, then add the tomatoes and cook until they begin to soften. Add the garlic and chile and cook for another minute, then the cinnamon and cumin and cook for another minute. Add a couple pinches of salt and pepper, and then add everything else, except garnishes. Bring to a gentle boil.
Reduce the heat and simmer the carrots until completely tender, 20-25 minutes. The mixture should remain moist but not be swimming in juice. If it gets too dry, add a little more water. If it is too sloppy, turn up the heat and boil off some of the liquid. Taste for seasoning and balance; the mixture should be sweet and savoury.
Serve topped with a generous dollop of yogurt, pistachios, coriander, and spring onion.
Recipe adapted from Diana Henry, A Change of Appetite: Where Healthy Meets Delicious (2014).
Rebecca’s Recipe of the Week: Pancakes for Supper
Crispy chickpea and carrot pancakes make a quick and tasty base for a variety of toppings. The chickpea flour creates a rich and moist interior that’s satisfying without being heavy. We ate these with spinach and avocado dressed with lemon and olive oil, and some grated goat cheese. You could also try roasted tomatoes topped with basil and a fried egg.
If you use two frying pans you can make two pancakes simultaneously, and the whole thing will take under 15 minutes.
Chickpea and Carrot Pancakes
Serves 2
Ingredients
125g chickpea flour (aka gram flour)
125g carrots, grated
175ml milk or oat milk
1 tsp roasted ground cumin, or coriander, or caraway, or fennel or mustard seed, as you prefer
Salt and pepper, to taste
1-2 tablespoons olive or rapeseed oil, for frying
Preparation
Mix the pancake ingredients aside from the oil in a blender—I used a Nutribullet—and blend until the mixture is smooth.
Heat two frying pans over medium heat and add the oil. Swirl the oil around to coat the bottom of each pan and let the oil get hot. Once it’s hot (test by adding a drop of water and seeing if it sizzles), pour half the batter into each pan and cook for 2 minutes. As it sets the colour will darken a bit and some bubbles will begin to appear on the top. Adjust the heat if you think it’s starting to get too brown on the bottom. Using a fish slice turn each pancake over and cook for an additional 1-2 minutes on the other side, until it looks firm.
Remove each pancake from the pan, and place on a plate. Top with your selected topping (see below) and enjoys.
Pancake Toppings
Spinach with avocado and goat cheese
Toss baby spinach with sliced avocado and dress with an olive oil and lemon vinaigrette (50% olive oil, 50% lemon juice, salt and pepper). Arrange some dressed spinach on each pancake, and top with grated goat or sheep cheese. Garnish with additional slices of avocado and a grind of black pepper.
Tomato, basil and egg
Drizzle cherry tomatoes with olive oil and roast in a 200C oven for 30 minutes. Toss with shredded basil and lemon zest. Arrange on pancake and top with a crispy fried egg.
Brussels sprout slaw with avocado and cheese
Trim the bottoms off several handfuls of Brussels sprouts and shred them finely. Dress with a lemon vinaigrette and toss with chopped parsley or coriander. Arrange on top of each pancake. Garnish with sliced avocado, freshly ground black pepper and lots of grated cheese.
Recipe adapted from Anna Jones, Guardian 6 Oct. 2018.
Rebecca’s Recipe of the Week: What to Do with an Ear of Corn
This is an approximation of a salad I’ve just eaten for lunch. (I’m currently in California, for work, since you wondered.) My salad was served with GREEN chickpeas, something I’d never encountered hitherto.
The corn in the California salad was roasted; if you are able to do this it will add depth to the flavour. See the instructions below.
The Border Grill’s Mexican Chopped Salad
Serves 4
Ingredients
Dressing Ingredients
4 tablespoons olive or rapeseed oil
2 tablespoons fresh lemon juice
1 teaspoon ground cumin (ideally, roast your cumin seeds in a dry pan and then grind them)
1 tablespoon fresh oregano, chopped roughly, or 1 teaspoon dried oregano, crumbled
1 tablespoon brown sugar
Salt and pepper, to taste
Salad Ingredients
2 ears of corn (or use 1 cup frozen corn, thawed)
1 medium red onion, peeled and diced
1 large tomato, diced
1 romaine or 2 little gem lettuces, shredded
1 crisp apple, diced
½ cup cooked chickpeas or black beans
½ cup toasted pumpkin seeds
Guacamole, to serve (optional)
Tortilla or plantain chips, to serve (optional)
Preparation
Make the dressing: combine the dressing ingredients in a jar with a lid and shake vigorously. Taste and see if you’d like more lemon, etc. Adjust as necessary.
IF you are able to roast the corn, follow the instructions below. Otherwise, shuck the corn and remove the stringy silk. Cut off the kernels: hold the ear vertically on its end and use a knife to cut the kernels off each cob. (Of course, if you’re using frozen corn this is unnecessary.) Place the kernels in a medium bowl with the diced red onion and cover with the dressing. Leave for 10 minutes, or longer.
When you’re ready to serve combine the corn and onion mixture with the other ingredients, toss well and serve, garnished, if you wish, with a dollop of guacamole and tortilla or plantain chips.
To Roast the Corn: Carefully peel back the husks from the corn, and remove the corn silks, leaving the husks attached. Wrap the husks back around each ear of corn. Soak the corn in a large bowl or sink of cold water for 10 minutes.
Meanwhile, pre-heat your grill to high.
Drain the corn well and place each husk-enclosed ear on the hot grill. Cook for about 12 minutes, turning frequently. Remove each cob from the grill and set aside to cool slightly. Then follow the instructions above to remove the kernels.
Rebecca’s Recipe of the Week: Mediterranean Green Beans and Tomatoes
When you cook beans slowly in olive oil the result is quite different from the snappy crispness produced by a quick dip in boiling water. The oil and tomatoes meld into a rich sauce that gives the dish substance and depth. Add some fresh basil and a slice of salty cheese, and enjoy for dinner with some crusty bread and a glass of red wine.
Rachel Roddy recommends you let the beans sit for a couple of hours before eating them but I think they’re pretty good straight away as well.
Braised Green Beans with Tomato and Basil
Serves 3-4
Ingredients
6 tablespoons olive oil
1 large or 2 small white onions, peeled and sliced thin
Salt
750g green beans or runner beans
750g ripe tomatoes, peeled if you wish, chopped coarsely
A handful of torn basil leaves
Feta, or other salty cheese, sliced, to serve (optional)
Preparation
Warm the oil in a heavy-based frying pan (with a lid) over a medium-low flame. Gently fry the onion with a pinch of salt until it is soft and translucent.
Cut or break the beans into 5cm-long pieces. Add them to the pan and stir well until each piece is glistening with oil. Continue cooking and stirring for a few minutes.
Add the tomatoes and another small pinch of salt, stir, then cover the frying pan. After a couple of minutes uncover the pan and stir – the tomatoes should be relinquishing their juices. Cover the pan and cook for another 5 minutes or so.
Once the tomatoes have given up their juice, uncover the pan and allow it to simmer, uncovered, stirring every now and then for around 40–50 minutes, or until the beans have become very tender and the tomatoes have reduced into a thick, rich sauce. During the final few minutes of cooking time, stir in the ripped basil leaves. Taste and season with more salt, if necessary.
Serve with slices of feta, if desired, or let them sit for a few hours before eating. These are very good the next day, as well.
Recipe adapted from Rachel Roddy, The Guardian, 23 May 2017.