Rebecca’s Recipe of the Week: Taming the Spanish Black Radish
As you may well still have your Black Spanish Radish from this week’s share, here are some recipes from Rebecca that have been waiting in the wings for the BSR’s first appearance of 2019!
These are fierce! They need some sweetness to balance their peppery bite. A dressing with honey and sherry vinegar does the trick. Combined with dried fruit and nuts in a salad, this will temper the outspoken radish.
Another option is to braise them. They emerge from a bath in butter and white wine softened, like a turnip’s more assertive older brother. Toss them with parsley and serve with roast chicken.
Green salad with Spanish black radish, pistachios and fig
Serves 2
Ingredients
dressing
2 tablespoons olive oil
2 teaspoons sherry vinegar
Juice and zest from 1 lime
1 teaspoon Dijon mustard
1 teaspoon runny honey
1/4 teaspoon salt
Black pepper
salad
150g salad mix
1 black Spanish radish, peeled and grated coarsely
1 big handful pistachio nuts, toasted in a dry pan and coarsely chopped
4 dried figs, cut into 6 pieces each
Preparation
(Leave the grated radish in a sieve to allow any liquid to drain off while you prepare the dressing.)
Put the dressing, put the ingredients into a jar with a lid and shake vigorously until the ingredients are combined. Taste and adjust the seasoning if necessary by adding a little more salt, or honey, etc., to balance the flavours.
Place salad ingredients in a serving bowl, and toss with the dressing. Serve.
Braised Carrot and Black Radish with Parsley
Serves 4
Ingredients
100g onions
350g carrots
2 black radishes
2 tablespoons olive oil
150ml white wine or vermouth
3 bay leaves
6 pepper corns
Salt to taste
2 tablespoons butter
25g parsley, chopped
Preparation
Peel the onions and cut into chunks. Peel the carrots and cut into batons.
Peel the black radishes and cut into batons of roughly the same size as the carrots.
Heat the olive oil in a saucepan over medium heat. Add the onions and sauté for a few minutes until they start to brown. Add the carrots and onions and toss everything together.
Pour over the white wine or vermouth, and add the bay leaves and pepper corns. Bring to a gentle boil, reduce the heat to low, cover, and simmer until the vegetables are tender, about 45 minutes. (This will depend on the size of your batons.) Check it occasionally to ensure it’s not sticking. If it seems dry add some water, stock or more wine.
Once the vegetables are tender, stir in the butter and give the vegetables a good toss. Add salt to taste, mix in the parsley, and serve.
Rebecca’s Recipe of the Week: Squash and Pink Peppercorns
‘Wow—that looks delicious!’, exclaimed a friend as we unpacked our lunches yesterday. It was. The ribbons of orange squash soften in lime juice spiked with the sweet spiciness of pink peppercorns. (These are essential; substituting black pepper will not work.). You can make this well in advance if you like.
Anna Jones recommends serving with tofu crisped in a pan with honey and soy, and brown rice, to make a dinner.
Squash and Pink Peppercorn Salad
Serves 2
Ingredients
500g pumpkin or squash, peeled and deseeded
1 lime
1 tablespoon pink peppercorns
1 teaspoon salt
Big handful of mint, dill, parsley or coriander, roughly chopped
Preparation
Shave the squash into thin ribbons, using a vegetable peeler or whatever specialist gear you happen to have. Place the ribbons in a bowl.
Zest the lime over the ribbons, squeeze in the juice, and toss together with the salt.
Put the pink peppercorns in a mortar and crush them roughly before adding to the salad.
Stir in the herbs and serve.
Recipe adapted from Anna Jones, The Modern Cook’s Year (2017).
Rebecca’s Recipe of the Week: Spicy Pumpkin with Barley
My friend Sharon gave me a copy of Diana Henry’s beautiful new cookbook. It consists of a series of menus. This magnificent recipe is from the menu called ‘Midnight at the Oasis’. She recommends serving it alongside some pickled vegetables with other nibbles, semolina bread with orange and aniseed, olive oil braised leeks with harissa and dill, roast sprouting broccoli with chile, feta and preserved lemon yoghurt . . . well, I’ll stop there but it’s a pretty mesmerising list of dishes, no?
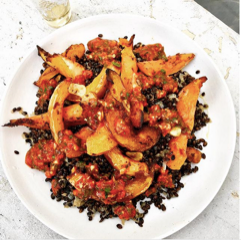
This particular dish combines the buttery crunch of barley with the melting texture of roast pumpkin, all topped with very spicy red shatta. (I’d not heard of it either, but it’s apparently a first cousin of zhug.) It turns out to be a thick, chile-hot blend of fresh green herbs with tomato and cumin. It’s very good.
I have no idea where you get black barley, so I used ordinary pearl (not instant) barley, and it was delicious.
Pumpkin with shatta and black barley
Serves 4
Ingredients
For the pumpkin
3 tablespoons olive oil
10g butter
1.5kg pumpkin
1 teaspoon fennel seeds, roughly crushed in a mortar
3cm ginger, peeled and grated
3 garlic cloves, finely sliced
For the barley
10g butter
1 tablespoon olive oil
4 small onions or shallots
250g barley
5 tablespoons dry white vermouth
700ml water or stock
2 bay leaves
Salt and pepper, to taste
For the shatta
5 red chiles, 4 de-seeded and all roughly chopped
3 garlic cloves, roughly chopped
50ml olive oil
50ml water
50g tomato purée
1 teaspoon ground cumin
Juice of ½ a small lemon
30g coriander and parsley in any proportion
Preparation
To make the pumpkin, preheat the oven to 190C. Put the olive oil and butter into a roasting pan large enough to allow the pumpkin to lie in a single layer, and melt in the oven while you prepare the pumpkin. Halve the pumpkin and remove the seeds. You can peel it or not as you prefer. Cut it into slices about 3cm thick.
Toss the pumpkin in the melted butter and oil, and roast for 20 minutes.
Add the fennel, ginger and garlic, toss, and roast for another 20 minutes or so, or until the pumpkin is tender and begins to caramelise on the edges. Set aside.
To make the barley, heat the butter and olive oil in a large saucepan and sauté the onions (or shallots) until they are soft but not coloured. Add the barley and stir it about for about 2 minutes so that it gets coated with butter. Add the vermouth and cook until about half of it has evaporated. Add the water or stock, bay leaves, and season with a bit of salt and pepper. Bring to a boil, and then reduce to a simmer. Cook, with the lid on, for about 40 minutes, or until the barley is al dente. The liquid should be absorbed but check a bit beforehand and if it’s still very liquidly, take off the cover and raise the heat a bit so that some of the liquid can evaporate.
To make the shatta, purée everything except the herbs in a blender and pulse into a chunky purée. Add the herbs and pulse it again so that you have a red purée flecked with green—don’t over-blend this. Set aside
To serve, arrange the barley on a big platter and set the pumpkin on top. Spoon some of the shatta over the top, and serve the rest on the side, in a little bowl.
From Diana Henry, How To Eat A Peach (2018).
Rebecca’s Recipe of the Week: Pancakes for Supper
Crispy chickpea and carrot pancakes make a quick and tasty base for a variety of toppings. The chickpea flour creates a rich and moist interior that’s satisfying without being heavy. We ate these with spinach and avocado dressed with lemon and olive oil, and some grated goat cheese. You could also try roasted tomatoes topped with basil and a fried egg.
If you use two frying pans you can make two pancakes simultaneously, and the whole thing will take under 15 minutes.
Chickpea and Carrot Pancakes
Serves 2
Ingredients
125g chickpea flour (aka gram flour)
125g carrots, grated
175ml milk or oat milk
1 tsp roasted ground cumin, or coriander, or caraway, or fennel or mustard seed, as you prefer
Salt and pepper, to taste
1-2 tablespoons olive or rapeseed oil, for frying
Preparation
Mix the pancake ingredients aside from the oil in a blender—I used a Nutribullet—and blend until the mixture is smooth.
Heat two frying pans over medium heat and add the oil. Swirl the oil around to coat the bottom of each pan and let the oil get hot. Once it’s hot (test by adding a drop of water and seeing if it sizzles), pour half the batter into each pan and cook for 2 minutes. As it sets the colour will darken a bit and some bubbles will begin to appear on the top. Adjust the heat if you think it’s starting to get too brown on the bottom. Using a fish slice turn each pancake over and cook for an additional 1-2 minutes on the other side, until it looks firm.
Remove each pancake from the pan, and place on a plate. Top with your selected topping (see below) and enjoys.
Pancake Toppings
Spinach with avocado and goat cheese
Toss baby spinach with sliced avocado and dress with an olive oil and lemon vinaigrette (50% olive oil, 50% lemon juice, salt and pepper). Arrange some dressed spinach on each pancake, and top with grated goat or sheep cheese. Garnish with additional slices of avocado and a grind of black pepper.
Tomato, basil and egg
Drizzle cherry tomatoes with olive oil and roast in a 200C oven for 30 minutes. Toss with shredded basil and lemon zest. Arrange on pancake and top with a crispy fried egg.
Brussels sprout slaw with avocado and cheese
Trim the bottoms off several handfuls of Brussels sprouts and shred them finely. Dress with a lemon vinaigrette and toss with chopped parsley or coriander. Arrange on top of each pancake. Garnish with sliced avocado, freshly ground black pepper and lots of grated cheese.
Recipe adapted from Anna Jones, Guardian 6 Oct. 2018.
Pip’s Recipe of the Week: Courgette boats
Our resident Recipe Meister, Rebecca Earle, is having a break during July, and so newly joined member Pip Smith has stepped forward to tantalise our tastebuds in Rebecca’s absence. Here’s this week’s recipe:
Mediterranean Stuffed Courgettes
Despite having a high water content Courgettes are a great source of vitamin C. The larger they get the more water they hold and it is then best to cook them with as little water as possible. My daughter always picks the largest and I just roll with it as she loves a stuffed courgette. This is the recipe we like to do together at home:
Ingredients:
One courgette
2 spring onions trimmed
Two medium tomatoes, seeds removed
Optional – a handful of chopped black olives
1 clove of garlic
1 slice of day old whole meal bread
1 tsp dried mixed herbs (unless you have some fresh)
1/2 tsp cracked black pepper
Rapeseed oil to spray
Method:
Heat the oven to 180 degrees
Slice the courgette lengthways and dig out the soft flesh and chop (you can choose to discard half the flesh).
Finely chop the tomatoes and spring onion.
Mix the tomato and onion with the olives if using and the courgette flesh.
Spray your baking tray with rapeseed oil and rub the courgette skins over the spray, leave flesh side up on the tray.
Cut the garlic in half and rub the garlic over the fleshy surface of the courgette.
Fill the courgette with the tomato mix.
Grate the bread into breadcrumbs and stir in the herbs and black pepper.
Sprinkle the bread crumbs over the courgette.
Finally spray the stuffed courgettes with rapeseed oil and bake for approximately 20 mins.
If you have fresh herbs leave out the dry ones and sprinkle with fresh herbs once removed from the oven. Enjoy!
Rebecca’s Recipe of the Week: Springtime Pasta
Pasta Primavera was (supposedly) invented at a fashionable New York City restaurant in the 1970s. The idea is to combine the freshest early spring vegetables with pasta, in a light, creamy sauce. This recipe is more of a guide than a strict set of instructions; you can vary the vegetables according to what’s in season (the original included mushrooms, tomatoes, broccoli and courgettes). You can garnish it with pine nuts. You can add red pepper flakes, or even a spoonful of pesto. Just don’t overcook the vegetables.
Pasta Primavera
Serves 4
Ingredients
¼ pound sugar snap peas, stems trimmed
½ pound asparagus, ends snapped
2 tablespoons unsalted butter
¾ cup fresh peas (or use frozen)
¼ cup thinly sliced spring onion, white part only (or use shallots)
2 garlic cloves, finely chopped
salt and pepper, to taste
12 ounces fettuccine or tagliatelle, preferably fresh
⅔ cup grated Parmesan, at room temperature
½ cup crème fraîche or whole milk Greek yogurt, at room temperature
3 tablespoons finely chopped parsley
1 tablespoon finely chopped tarragon or basil
2 radishes, thinly sliced
Preparation
Bring a large pot of heavily salted water to a boil over medium-high heat.
While the water is coming to a boil, slice snap peas and asparagus stems into ¼-inch-thick pieces; leave asparagus tips whole.
Melt butter in a large skillet over medium-high heat. Add snap peas, asparagus, fresh peas and onion. (If you are using frozen peas don’t add them until later). Cook until vegetables are barely tender but not at all soft or mushy, 3 to 4 minutes. Stir in garlic and cook 1 minute more. If you are using frozen peas, add them now. Season with salt and pepper; set aside.
Drop pasta into boiling water and cook until al dente (1 to 3 minutes for fresh pasta, more for dried). Drain, making sure to save a cup of the cooking water, and transfer pasta to a large bowl. Immediately toss pasta with vegetables, cheese, crème fraîche (or yoghurt) and herbs. If it looks a bit dry, add some of the preserved cooking water to thin it out a bit. Season generously with salt and pepper, if needed. Garnish with the sliced radishes and serve.
Recipe adapted from Melissa Clark
Rebecca’s Recipe of the Week: Basil Green Goddess Dressing
This herby, mayonnaise-based salad dressing is a California classic. It’s also great on top of a piece of grilled fish or roasted vegetables.
Green Goddess Dressing
Ingredients
1/4 cup crème fraiche or soured cream
2 tablespoons good mayonnaise (ideally, you’ll make your own . . .)
2 anchovy fillets, chopped
1 garlic clove, roughly chopped
1 tablespoon fresh chives, chopped
1 tablespoon fresh parsley, chopped
2 tablespoon basil, chopped
1½ teaspoons freshly squeezed lemon juice
¼ teaspoon freshly ground black pepper
Preparation
Combine all the ingredients in a blender or food processor, and blend until the mixture is bright green and smooth. You can also use a hand-held immersion blender. Test to see if it needs a little more zing from lemon juice, and serve.
Rebecca’s Recipe of the Week: Leeks for Lunch
This is what I ate for lunch today. It’s easy, satisfying, and makes good use of the Canalside leeks you’ve accumulated in the fridge. The leeks meld with the vinaigrette to create a sumptuous, slippery mass. Toasted nuts contrast with the soft strands of leek. You could also add little cubes of cheese, or use this as a topping for a piece of toast.
Leeks Vinaigrette
Serves 1
Ingredients
4 leeks
1 tablespoon of sherry vinegar
big pinch of salt, and freshly ground black pepper
2 tablespoons of walnut oil, or, failing that, olive oil
handful of hazelnuts or walnuts, coarsely chopped
handful of fresh parsley, chopped
Preparation
Bring a pot of salted water to the boil.
Meanwhile, trim the ends off the leeks, and peel off the outer layer. Cut off and discard the tough, dark green upper bit. Slice each leek in half vertically.
Plunge the halved leeks into the boiling water and simmer for 8-10 minutes.
While the leeks are cooking prepare the vinaigrette in a serving bowl: pour the vinegar into the bowl, and add the salt and pepper. Slowly drizzle in the oil, whisking all the while with a fork. Set aside until the leeks are cooked.
After 8 minutes check the leeks to see if they’re tender when poked with a fork. Once they’re tender drain them and then add them while they’re still warm to the bowl with the vinaigrette. Toss together and leave to cool, or until you’re ready to eat them.
Heat a small frying pan over medium heat and add the nuts. Toast for about 4 minutes, stirring occasionally so that they toast on all sides, and taking care that they do not burn. Once they smell appetising and have begun to turn a toasty colour, add them to the leeks.
When the leeks are cool, or you wish to eat them, add the chopped parsley, stir, check to see if it needs more salt or pepper, and enjoy.
Rebecca’s Recipe of the Week: Jerusalem Artichokes
Here, in honour of Canalside’s surprise Jerusalem artichoke harvest, is a simple recipe. Jerusalem artichokes originated in North America; they were one of the many new foods that reached Europe in the aftermath of Columbus’s 1492 voyage to the Americas. Their name has nothing to do with the Middle-Eastern city. Rather, it reflects the fact that Jerusalem artichokes are botanically related to the sunflower, or girasole in Italian. ‘Jerusalem’ is an approximation of the Italian name. The ‘artichoke’ bit reflects the vague similarity in taste between globe artichokes and our little tubers. In French the name . . . , well, that’s probably enough history.
Jerusalem Artichokes with Cream and Herbs
Serves 4 as a side dish.
Ingredients
500g Jerusalem artichokes
4 shallots, peeled
2 cloves of garlic
150ml crème fraîche
salt and pepper to taste
juice of 1 lemon
150g medium-hard cheese, grated. You could use Emmental, gruyère, Jarlsberg, or Gouda, for instance. Cheddar would work too.
4 sprigs of fresh thyme, or about 1 teaspoon dried thyme leaves
a handful of parsley, chopped
Preparation
Pre-heat the oven to 200C. Bring a large pan of water to the boil.
Once the water is boiling drop in the Jerusalem artichokes and boil gently for 15 minutes, and drain. This allegedly reduces the tuber’s gas-inducing tendencies.
While the Jerusalem artichokes are cooking cut the shallots lengthwise into boat-shaped pieces. Finely chop the garlic.
Cut the drained Jerusalem artichokes into chunks.
Combine everything aside from the parsley and tip into an ovenproof dish.
Bake for about 30 minutes, until the Jerusalem artichokes are tender. The top should turn an appetising golden colour but keep an eye on it so that it doesn’t burn.
Remove from the oven and top with the chopped parsley and an additional grind or two of pepper.
Recipe adapted from http://www.jarlsberg.com/uk/recipes/jerusalem-atichokes-au-gratin
Dom’s Recipe of the Week: Frittata from the oven
This is a great way to use up odds and ends of fresh veg, and leftovers too. You can use more or less whatever you fancy from the list, though I do think some kind of onion is essential. As the egg is poured straight into the roasting dish full of hot veg, you don’t need to fry this frittata at all, but it helps to have a heavy ceramic or cast-iron dish, which retains the heat well. And the eggs should be at room temperature, not cold from the fridge.
Oven-roasted roots frittata
Ingredients
About 600g mixed winter veg, such as onions, carrots, squash or pumpkin, parsnip, celeriac, beetroot, jerusalem artichokes, black spanish radish, potatoes
1 large garlic clove, finely chopped
3 tablespoons rapeseed or olive oil
7 large or 8 medium eggs
A handful of mixed herbs, such as curly parsley, chives and thyme, finely chopped
About 20g Parmesan, hard goat’s cheese or other well-flavoured hard cheese, grated
Sea salt and freshly ground black pepper
Method
Preheat the oven to 190°C/Gas Mark 5. Meanwhile, prepare your chosen veg: peel shallots or onions and quarter or thickly slice; peel carrots and cut into 5mm slices; peel squash or pumpkin, deseed and cut into 2–3cm cubes; peel parsnip, celeriac and beetroot and cut into 1–2cm cubes; cut potatoes into 1–2cm cubes.
Put all the veg into an ovenproof dish, about 23cm square. Add the garlic, oil and plenty of salt and pepper and toss well. Roast for about 40 minutes, stirring halfway through, until the veg are all tender and starting to caramelise in places.
Beat the eggs together with the chopped herbs and some more salt and pepper. Take the dish from the oven, pour the egg evenly over the veg and scatter over the grated cheese. Return to the oven for 10–15 minutes until the egg is all set and the top is starting to colour. If your oven has a grill, you can use that to accelerate the browning of the top.
Leave to cool slightly, then slide the frittata out on to a plate or board. Serve warm or cold. Perfect lunchbox fare…
Thanks to River Cottage