Rebecca’s Recipe of the Week: Mediterranean Green Beans and Tomatoes
When you cook beans slowly in olive oil the result is quite different from the snappy crispness produced by a quick dip in boiling water. The oil and tomatoes meld into a rich sauce that gives the dish substance and depth. Add some fresh basil and a slice of salty cheese, and enjoy for dinner with some crusty bread and a glass of red wine.
Rachel Roddy recommends you let the beans sit for a couple of hours before eating them but I think they’re pretty good straight away as well.
Braised Green Beans with Tomato and Basil
Serves 3-4
Ingredients
6 tablespoons olive oil
1 large or 2 small white onions, peeled and sliced thin
Salt
750g green beans or runner beans
750g ripe tomatoes, peeled if you wish, chopped coarsely
A handful of torn basil leaves
Feta, or other salty cheese, sliced, to serve (optional)
Preparation
Warm the oil in a heavy-based frying pan (with a lid) over a medium-low flame. Gently fry the onion with a pinch of salt until it is soft and translucent.
Cut or break the beans into 5cm-long pieces. Add them to the pan and stir well until each piece is glistening with oil. Continue cooking and stirring for a few minutes.
Add the tomatoes and another small pinch of salt, stir, then cover the frying pan. After a couple of minutes uncover the pan and stir – the tomatoes should be relinquishing their juices. Cover the pan and cook for another 5 minutes or so.
Once the tomatoes have given up their juice, uncover the pan and allow it to simmer, uncovered, stirring every now and then for around 40–50 minutes, or until the beans have become very tender and the tomatoes have reduced into a thick, rich sauce. During the final few minutes of cooking time, stir in the ripped basil leaves. Taste and season with more salt, if necessary.
Serve with slices of feta, if desired, or let them sit for a few hours before eating. These are very good the next day, as well.
Recipe adapted from Rachel Roddy, The Guardian, 23 May 2017.
Rebecca’s Recipe of the Week: Three Bruschettas
Welcome back to Rebecca – here’s her first recipe after her break in July:
A bruschetta is an Italian open-faced sandwich. To make it you grill some good sourdough bread, rub it with a bit of garlic, drizzle it with olive oil, and add a topping. Roast courgette, grilled aubergine, and chickpeas with Swiss chard all make tasty and quick toppings. Make just one, or serve all three for a fresh and summery dinner.
Basic Bruschetta
For each bruschetta you need:
Ingredients
1 generous slice of a decent sourdough bread
1 garlic clove, peeled
Olive oil, to drizzle
Grill the bread on both sides. Grilling gives a better result, but you can use a toaster if need be. Rub the grilled bread on one side with the garlic, and drizzle with olive oil. Your bruschetta base is now ready for a topping.
Roast Courgette
Enough to top 1-2 bruschetta
Ingredients
1 medium courgette
Olive oil to drizzle
¼ fresh red chile, chopped, or to taste
Several sprigs of fresh mint, chopped
Preheat oven to 200C. Cut the courgette lengthwise into 5mm slices. Place slices on a baking sheet and drizzle with olive oil. Bake until crisp, about 10 minutes. Turn the slices over part-way through so they get crisp on both sides. Mix the roast courgettes with the chopped chiles and mint, arrange on the bruschetta, add a final drizzle of olive oil, and eat.
Grilled Aubergine
Enough to top 2 bruschetta
Ingredients
1 Canalside aubergine (i.e. one very small aubergine. . .)
Olive oil
Lemon juice
Small handful of fresh basil, shredded
Salt and pepper, to taste
¼ fresh red chile, chopped, or to taste
Preheat the grill. Cut the aubergine into very thin slices and arrange in the grill pan. Grill on both sides until tender, about 10 minutes in total. Don’t forget to turn them over halfway through. Toss the grilled aubergine with a tablespoon or two of olive oil, a good squeeze of lemon juice, the shredded basil, and salt and pepper to taste. Arrange on the bruschetta, top with the chopped chile, and serve.
Chickpea Chard
Enough to top 2 bruschetta
Ingredients
About 200g Swiss chard (or spinach)
Olive oil
1 garlic clove, minced
Salt and pepper, to taste
1 400g tin of chickpeas, drained and rinsed
Juice of 1 lemon
¼ fresh red chile, chopped, or to taste
Boil the chard in water until tender, about 3-6 minutes. Drain and chop roughly. Return the cooked chard to the pan with about a tablespoon of olive oil and the garlic, and braise for another 5 minutes or so. Season and set aside.
Heat the chickpeas in a pan with another tablespoon or two of olive oil and the lemon juice, just until warm. Purée or mash the chickpeas and season to taste. Spread some of the puréed chick peas over part of each bruschetta, and arrange some chard alongside it, so that the two toppings are next to each other, rather than one on top of the other. Sprinkle the chile over the top, drizzle with a little more olive oil and eat.
Recipes adapted from Rose Gray and Ruth Rogers, River Cafe Cook Book Easy (2003).
Pip’s Recipe of the Week: Hot weather? How about a cold soup?
Our resident Recipe Meister, Rebecca Earle, is having a break during July, and so newly joined member Pip Smith has stepped forward to tantalise our tastebuds in Rebecca’s absence. Thanks Pip for standing in. Here’s this week’s recipe, the final one from Pip in this guest slot – Rebecca will be back next time:
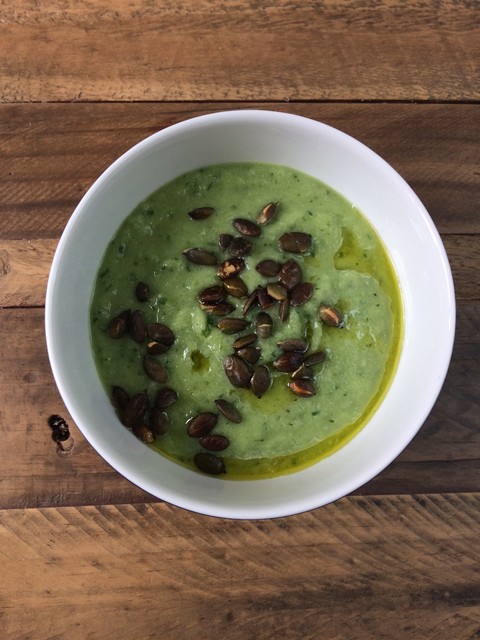
This is an adapted recipe from a soup in Anna Jones ‘a modern way to cook’ – it’s adapted only because I don’t have the recipe book anymore, otherwise I would have followed it! With all this hot weather there’s probably nothing more important than keeping well hydrated. We take in a lot of our daily water from our food, in particular from fruits and vegetables. When I looked at the cucumbers in my fridge I immediately fancied a cool and hydrating soup, here’s the recipe I used.
Avocado and cucumber soup
Ingredients:
1 1/2 cucumbers chopped
The flesh of 1 avocado
The juice of 1 lemon
1 handful of basil
2 spring onions
2 handfuls of toasted seeds
Extra virgin olive oil
Salt and pepper to taste
Method:
Pop the cucumber, avocado, basil, spring onion and lemon juice into a blender or use a stick blender and deep bowl.
Season with salt and pepper.
Dish into bowls, sprinkle with toasted seeds and a dash of extra virgin olive oil.
Optional – you might like to chill before serving. I mean the soup.
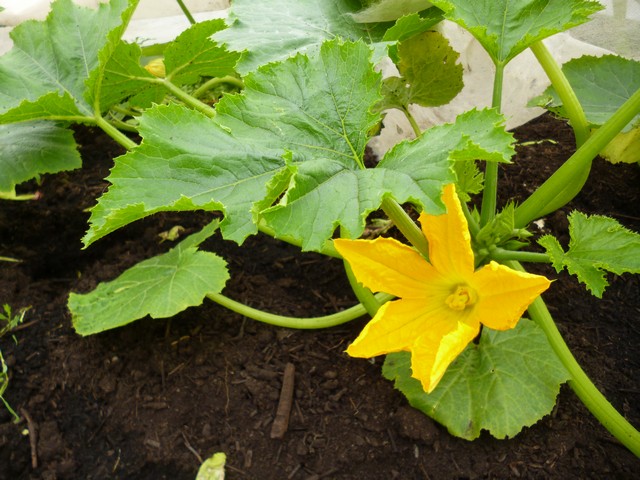
Pip’s Recipe of the Week: Courgette boats
Our resident Recipe Meister, Rebecca Earle, is having a break during July, and so newly joined member Pip Smith has stepped forward to tantalise our tastebuds in Rebecca’s absence. Here’s this week’s recipe:
Mediterranean Stuffed Courgettes
Despite having a high water content Courgettes are a great source of vitamin C. The larger they get the more water they hold and it is then best to cook them with as little water as possible. My daughter always picks the largest and I just roll with it as she loves a stuffed courgette. This is the recipe we like to do together at home:
Ingredients:
One courgette
2 spring onions trimmed
Two medium tomatoes, seeds removed
Optional – a handful of chopped black olives
1 clove of garlic
1 slice of day old whole meal bread
1 tsp dried mixed herbs (unless you have some fresh)
1/2 tsp cracked black pepper
Rapeseed oil to spray
Method:
Heat the oven to 180 degrees
Slice the courgette lengthways and dig out the soft flesh and chop (you can choose to discard half the flesh).
Finely chop the tomatoes and spring onion.
Mix the tomato and onion with the olives if using and the courgette flesh.
Spray your baking tray with rapeseed oil and rub the courgette skins over the spray, leave flesh side up on the tray.
Cut the garlic in half and rub the garlic over the fleshy surface of the courgette.
Fill the courgette with the tomato mix.
Grate the bread into breadcrumbs and stir in the herbs and black pepper.
Sprinkle the bread crumbs over the courgette.
Finally spray the stuffed courgettes with rapeseed oil and bake for approximately 20 mins.
If you have fresh herbs leave out the dry ones and sprinkle with fresh herbs once removed from the oven. Enjoy!
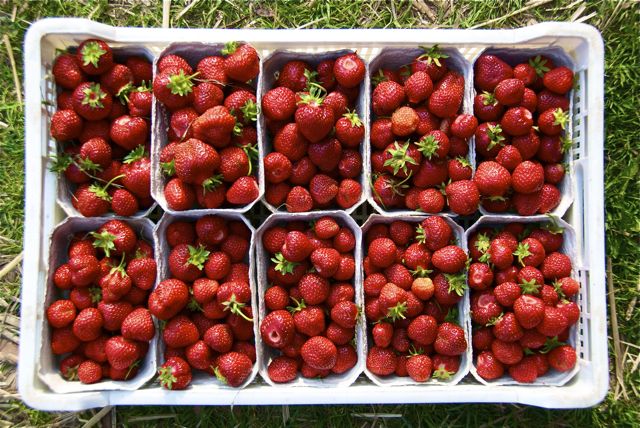
Rebecca’s Recipe of the Week: Berries
This very simple recipe is a nice way to use a smallish quantity of strawberries. You can dress it up by serving with ice cream, or create a version of Eton mess by folding the berries and raspberry sauce into some lightly-whipped cream and crushed meringue.
Strawberries and Blueberries in Raspberry Sauce
Serves 4
Ingredients
200g raspberries (frozen is fine but thaw them first)
1-2 tablespoons icing sugar
250g strawberries, hulled
250g blueberries
a few leaves of fresh basil or mint, shredded (optional)
Preparation
Purée the raspberries in a blender (standard or stick) and then push the purée through a sieve to remove the pips. Sweeten to taste with the icing sugar. You want this to retain a hint of tartness.
Slice the strawberries into thick slices and toss with the raspberry sauce into a serving bowl. Stir in the blueberries and add the shredded herbs if you wish to use them. Leave to sit at room temperature for about an hour so that the flavours blend.
Recipe adapted from Hugh Fearnley-Whittingstall, River Cottage Fruit Every Day! (2013).
21st June 2018
Rebecca’s Recipe of the Week: A Very Quick Lunch
This is a satisfying and very quick lunch salad. At least it’s quick if you have a hard-cooked egg to hand. It doesn’t require much in the way of equipment either. This week, you can follow it with the strawberries for an indulgent lunch for one.
Grated Courgette and Egg Salad
Serves 1.
Ingredients
2 small courgettes (a mixture of yellow and green is pretty)
1 hard-cooked egg
a small handful of dill
2 teaspoons rapeseed oil
juice of half a lemon
salt and pepper to taste
Preparation
Cut the end off the courgettes, and using the coarse side of a grater, grate the courgettes into a bowl. Gently grate hard-cooked egg into the same bowl. The egg might crumble a bit but that’s ok.
Remove the tough stems from the dill and chop the delicate fronds, coarse or fine, as you prefer. Add the dill to the bowl. Toss about to mix.
Drizzle the oil on top, and then squeeze the lemon over the salad. Season with salt and pepper to taste, toss again, and eat from the same bowl.
14th June 2018
Rebecca’s Recipe of the Week: Springtime Pasta
Pasta Primavera was (supposedly) invented at a fashionable New York City restaurant in the 1970s. The idea is to combine the freshest early spring vegetables with pasta, in a light, creamy sauce. This recipe is more of a guide than a strict set of instructions; you can vary the vegetables according to what’s in season (the original included mushrooms, tomatoes, broccoli and courgettes). You can garnish it with pine nuts. You can add red pepper flakes, or even a spoonful of pesto. Just don’t overcook the vegetables.
Pasta Primavera
Serves 4
Ingredients
¼ pound sugar snap peas, stems trimmed
½ pound asparagus, ends snapped
2 tablespoons unsalted butter
¾ cup fresh peas (or use frozen)
¼ cup thinly sliced spring onion, white part only (or use shallots)
2 garlic cloves, finely chopped
salt and pepper, to taste
12 ounces fettuccine or tagliatelle, preferably fresh
⅔ cup grated Parmesan, at room temperature
½ cup crème fraîche or whole milk Greek yogurt, at room temperature
3 tablespoons finely chopped parsley
1 tablespoon finely chopped tarragon or basil
2 radishes, thinly sliced
Preparation
Bring a large pot of heavily salted water to a boil over medium-high heat.
While the water is coming to a boil, slice snap peas and asparagus stems into ¼-inch-thick pieces; leave asparagus tips whole.
Melt butter in a large skillet over medium-high heat. Add snap peas, asparagus, fresh peas and onion. (If you are using frozen peas don’t add them until later). Cook until vegetables are barely tender but not at all soft or mushy, 3 to 4 minutes. Stir in garlic and cook 1 minute more. If you are using frozen peas, add them now. Season with salt and pepper; set aside.
Drop pasta into boiling water and cook until al dente (1 to 3 minutes for fresh pasta, more for dried). Drain, making sure to save a cup of the cooking water, and transfer pasta to a large bowl. Immediately toss pasta with vegetables, cheese, crème fraîche (or yoghurt) and herbs. If it looks a bit dry, add some of the preserved cooking water to thin it out a bit. Season generously with salt and pepper, if needed. Garnish with the sliced radishes and serve.
Recipe adapted from Melissa Clark
Rebecca’s Recipe of the Week: Basil Green Goddess Dressing
This herby, mayonnaise-based salad dressing is a California classic. It’s also great on top of a piece of grilled fish or roasted vegetables.
Green Goddess Dressing
Ingredients
1/4 cup crème fraiche or soured cream
2 tablespoons good mayonnaise (ideally, you’ll make your own . . .)
2 anchovy fillets, chopped
1 garlic clove, roughly chopped
1 tablespoon fresh chives, chopped
1 tablespoon fresh parsley, chopped
2 tablespoon basil, chopped
1½ teaspoons freshly squeezed lemon juice
¼ teaspoon freshly ground black pepper
Preparation
Combine all the ingredients in a blender or food processor, and blend until the mixture is bright green and smooth. You can also use a hand-held immersion blender. Test to see if it needs a little more zing from lemon juice, and serve.
Rebecca’s Recipe of the Week: Turmeric and Lime Leaf Broth
‘A combination of lifting aromatics and wintery earthy roots, roasted until crisp around the edges and sweet’, writes Anna Jones. This flavoursome broth is satisfying and unctuous without being cloying or heavy. I think you will enjoy it. ‘Definitely one for a Canalside recipe’ said Matt when I made this.
Anna Jones notes that you can use any root vegetables that you like—beetroot or potatoes could be substituted for the carrots, parsnips and swedes.
Turmeric and Lime Leaf Broth with Roasted Roots
Serves 4.
Ingredients
200g carrots, peeled and halved if big
350g parsnips, peeled and quartered
500g swede, peeled and roughly chopped
salt and pepper, to taste
coconut oil
1 thumb-sized piece of ginger root, peeled
1 thumb-sized piece of turmeric root, peeled
1 bunch of coriander
2 large shallots, finely sliced, divided into two portions
1 clove garlic, finely sliced
1 tablespoon coriander seeds, roughly smashed
1 red chilli, finely chopped
1 x 400g tin of coconut milk
4 lime leaves
To Serve
200g cooked grains
1 lime, halved
Preparation
Preheat the oven to 220C.
Place the prepared roots into a baking tray with a big pinch of salt and 1 tablespoon of coconut oil. Put in the oven. After 5 minutes remove it and toss everything together. Return it to the oven and roast for about 35 minutes, or until everything is golden. Toss it periodically while it’s roasting.
Meanwhile prepare the broth: first grate the ginger and turmeric.
Cut off the stalks of the coriander and chop these roughly. Keep the leaves to garnish the soup.
Add another tablespoon of coconut oil to a saucepan and heat over medium heat. Add half the shallots and sauté for about 5 minutes, until they begin to brown. Add the grated ginger and turmeric, the chopped coriander stalks, the garlic, coriander seeds and chile. Sauté for a few more minutes.
Add the coconut milk and the lime leaves. Fill the empty tin with water and add this to the pan as well. Season to taste with salt and pepper and simmer for 10 minutes.
While the broth is simmering heat another tablespoon of coconut oil in a sauté pan over high heat. When it’s really hot add the remaining shallot and cook until it’s crispy and golden—but don’t let it burn. Remove the crispy shallots from the pan onto some kitchen paper. Spread them out so they don’t all stick to each other and go soggy.
Once the roots are ready, spoon the grains into four bowls. Place the roasted roots over the grains and ladle the soup over the top. Garnish with the coriander leaves and crispy shallots. Serve with the lime halves for an extra lime kick.
Recipe adapted from Anna Jones, The Modern Cook’s Year (2017).
Rebecca’s Recipe of the Week: Leeks for Lunch
This is what I ate for lunch today. It’s easy, satisfying, and makes good use of the Canalside leeks you’ve accumulated in the fridge. The leeks meld with the vinaigrette to create a sumptuous, slippery mass. Toasted nuts contrast with the soft strands of leek. You could also add little cubes of cheese, or use this as a topping for a piece of toast.
Leeks Vinaigrette
Serves 1
Ingredients
4 leeks
1 tablespoon of sherry vinegar
big pinch of salt, and freshly ground black pepper
2 tablespoons of walnut oil, or, failing that, olive oil
handful of hazelnuts or walnuts, coarsely chopped
handful of fresh parsley, chopped
Preparation
Bring a pot of salted water to the boil.
Meanwhile, trim the ends off the leeks, and peel off the outer layer. Cut off and discard the tough, dark green upper bit. Slice each leek in half vertically.
Plunge the halved leeks into the boiling water and simmer for 8-10 minutes.
While the leeks are cooking prepare the vinaigrette in a serving bowl: pour the vinegar into the bowl, and add the salt and pepper. Slowly drizzle in the oil, whisking all the while with a fork. Set aside until the leeks are cooked.
After 8 minutes check the leeks to see if they’re tender when poked with a fork. Once they’re tender drain them and then add them while they’re still warm to the bowl with the vinaigrette. Toss together and leave to cool, or until you’re ready to eat them.
Heat a small frying pan over medium heat and add the nuts. Toast for about 4 minutes, stirring occasionally so that they toast on all sides, and taking care that they do not burn. Once they smell appetising and have begun to turn a toasty colour, add them to the leeks.
When the leeks are cool, or you wish to eat them, add the chopped parsley, stir, check to see if it needs more salt or pepper, and enjoy.