Rebecca’s Recipe of the Week: Pumpkins, Lentils, Ginger
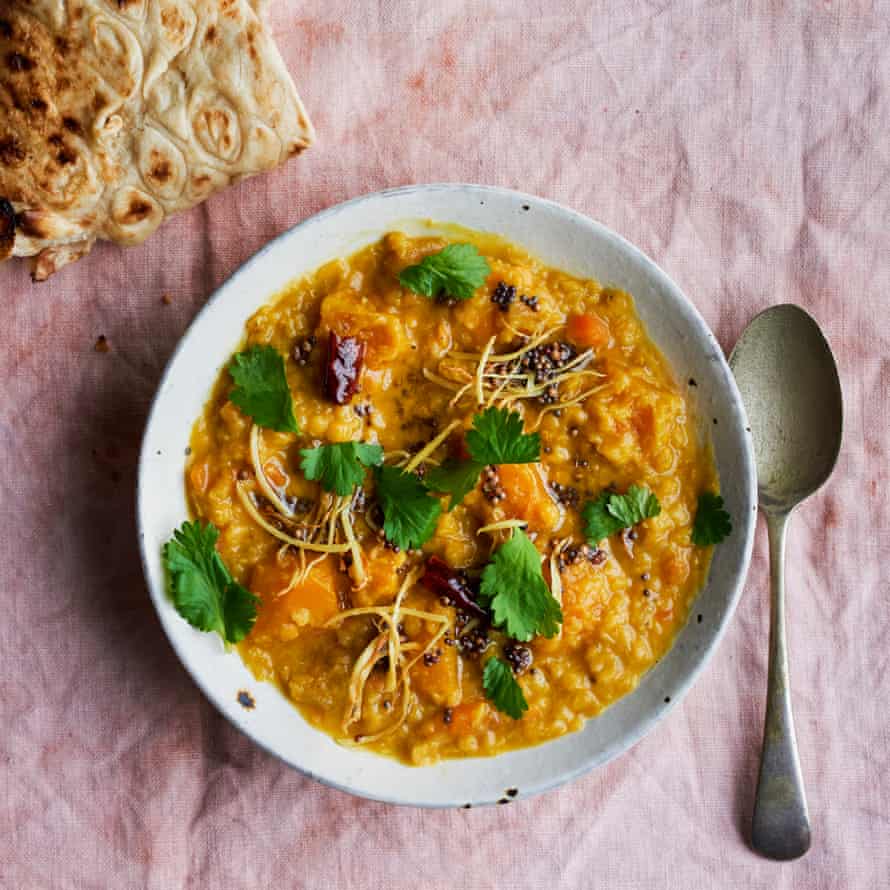
The zingy, fried ginger topping gives this dal an invigorating freshness. Absolutely don’t leave it out!
The ratio between the pumpkin and the carrots does not need to be precise and overall I used a good deal more pumpkin than the 200g called for in the original recipe. Plus I didn’t have a Kashmiri red chilli so I used a dried Canalside chile and that worked just fine. Serve with flatbreads or rice.
Red lentil dal with carrots, pumpkin, and fried ginger
Serves 4
Ingredients
210g red lentils
3 tbsp coconut oil
150g onion, cut into half moons
100g carrots, finely diced
200-300g pumpkin, peeled and diced into 2cm pieces
½ tsp ground turmeric
½ teaspoon ground red chilli powder
1 teaspoon salt
2 tablespoon fresh lime or lemon juice
2 teaspoon coriander seeds, crushed
2 teaspoon black or brown mustard seeds
5cm piece fresh ginger, peeled and cut into matchsticks
1 Kashmiri red chilli
10g chopped fresh coriander leaves
Preparation
Clean the lentils for any debris, rinse under cold running water, then put in a bowl, cover with 500ml cold water and set aside.
Heat a tablespoon of the oil over medium-high heat in a medium saucepan. Add the onions, and saute until they turn translucent – three to four minutes. Add the carrots and pumpkin, and saute until tender – about eight minutes. Stir in the turmeric and red chilli powder, and cook for a further minute.
Add the lentils and their soaking water to the vegetables, stir in a teaspoon of salt and bring to a rolling boil over a medium-high heat. Reduce the heat to low, cover and leave to simmer until the vegetables are completely tender and cooked – about 20 minutes. Remove from the heat, stir in the lime juice, taste and season with salt as needed.
Heat the remaining coconut oil in a small saucepan over a medium heat. When the oil is hot, add the coriander and mustard seeds, and cook until the seeds start to pop. Add the ginger to the hot oil, cover the pan with a lid and swirl for 30 seconds, until the mustard seeds stop sputtering.
Break the Kashmiri chilli in half and toss it into the hot oil. Remove from the heat and swirl the contents of the saucepan for another 30 seconds, until the chilli turns crisp. Pour this hot mixture over the lentils. Garnish with the fresh coriander leaves and serve warm with buttered flatbread or plain rice.
Recipe adapted from Nik Sharma, Guardian 31 Oct. 2020.
Rebecca’s Recipe of the Week: Pasta with Creamy Carrot Miso Sauce
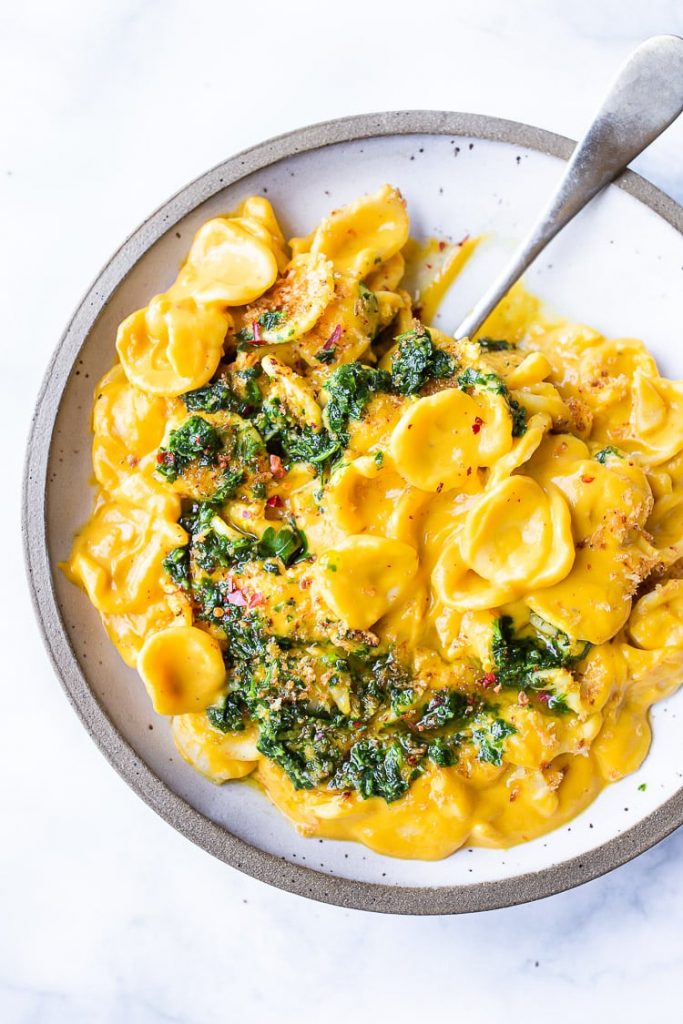
Another very good recipe from Slyvia Fontaine. The creamy carrot sauce colours the pasta a beautiful gold, while the fresh, herby gremolata adds vibrant green. Toasted breadcrumbs provide a contrasting crunch against the richness of the sauce. You would certainly not guess that this is vegan, but you’ll see right away how beautiful it looks in your bowl. The flavours work really well together and I recommend this highly.
Pasta with Creamy Carrot Miso Sauce
Serves 4
Ingredients
Carrot Miso Sauce
2 shallots, rough chopped (or 1/2 an onion)
3 large garlic cloves, rough chopped
2 tablespoons olive oil
150g carrots
450ml water
40g cashews
Freshly-ground pepper
3 tablespoons white miso paste
Gremolata
60g fresh coriander or parsley (Sylvia notes you can also use carrot tops)
1 tablespoon lemon zest ( zest from one medium lemon)
¼ teaspoon salt
1 fat garlic clove
70-100ml olive oil
Toasted Breadcrumbs
1 thick slice of good bread, grated, to make about 50g breadcrumbs
250g pasta (Sylvia Fontaine recommends orecchiette)
Instructions
Cook the sauce: Heat oil in a medium pot, over medium heat. Saute shallot and garlic until fragrant and golden, about 5 minutes, stirring often. Add carrots, cashews, water, and pepper and bring to a boil. Cover, lower heat to low and simmer gently until carrots are fork-tender, about 15 minutes. Stir in the 3 tablespoons of miso and let cool for 5-10 minutes.
While the carrots simmer make the Gremolata: Place coriander or parsley, lemon zest, salt and garlic in a food processer and pulse repeatedly until finely chopped. Add 70ml oil, pulsing a few more times until incorporated (but not too smooth). Add more oil if you prefer a looser version.
Now make the breadcrumbs: place the breadcrumbs in a frying pan over medium heat and toast, stirring frequently, until the crumbs are golden brown. Set aside.
Bring some water to the boil, and cook the pasta according to the packet instructions.
While the pasta is cooking blend the sauce: place the carrot-cashew sauce in a high-speed blender or food processor and blend on the lowest setting, gradually increasing speed, until fully blended, creamy and silky smooth, which will take between one and two minutes. Slyvia writes: ‘Take your time here and get it SMOOTH!!!’
Drain the pasta and pour the sauce over. Heat it gently if needed. Taste and adjust salt.
Divide among bowls, and sprinkle with toasted bread crumbs and spoon the gremolata over top. Enjoy with a glass of chardonnay.
Recipe adapted from Sylvia Fontaine, Feasting at Home
Rebecca’s Recipe of the Week: Peas (and Salmon)
Peas cooked with onions and butter make an excellent dish to eat on their own. Add some pan-seared salmon fillets and you have an easy and very delicious meal.
(To pan-sear, dry the salmon carefully and then season liberally with salt. Heat a little neutral oil in a skillet, and when it is hot add the salmon, skin-side down. Press it into the pan with a fish so that it makes good contact with the heat. Cook, without moving the fish, for about 3 minutes, and then flip it over to cook the other side. Cook for an additional 1-4 minutes, depending on how cooked you like your fish.)
Peas with Parsley, Thyme, Butter and Onions
Serves 4 as part of a larger meal.
Ingredients
2 tablespoons neutral oil (rapeseed, sunflower seed etc.)
1 giant Canalside spring onion, thinly sliced (use the whole thing including the dark green leaves)
½ teaspoon salt
1/2 cup white wine
1 cup chicken stock
4 cups frozen (or fresh) peas
4 tablespoons butter
¾ cup fresh parsley, roughly chopped
5 springs of fresh thyme, roughly chopped
Preparation
Heat the oil in a large frying pan over medium heat. Add the sliced onion and the salt. Reduce the heat to low and cook until the onion is translucent and soft, but not brown. Add the wine and allow to reduce until almost completely dry.
Add the stock and bring to a boil. Add the peas and butter and cook until the stock has reduced, and the sauce is thick and silky with butter. Then add the parsley and thyme check for salt and pepper, and serve.
Recipe adapted from Abra Berens, Ruffage: A Practical Guide to Vegetables (2019).
Rob’s Recipe of the Week: Panzanella riffed
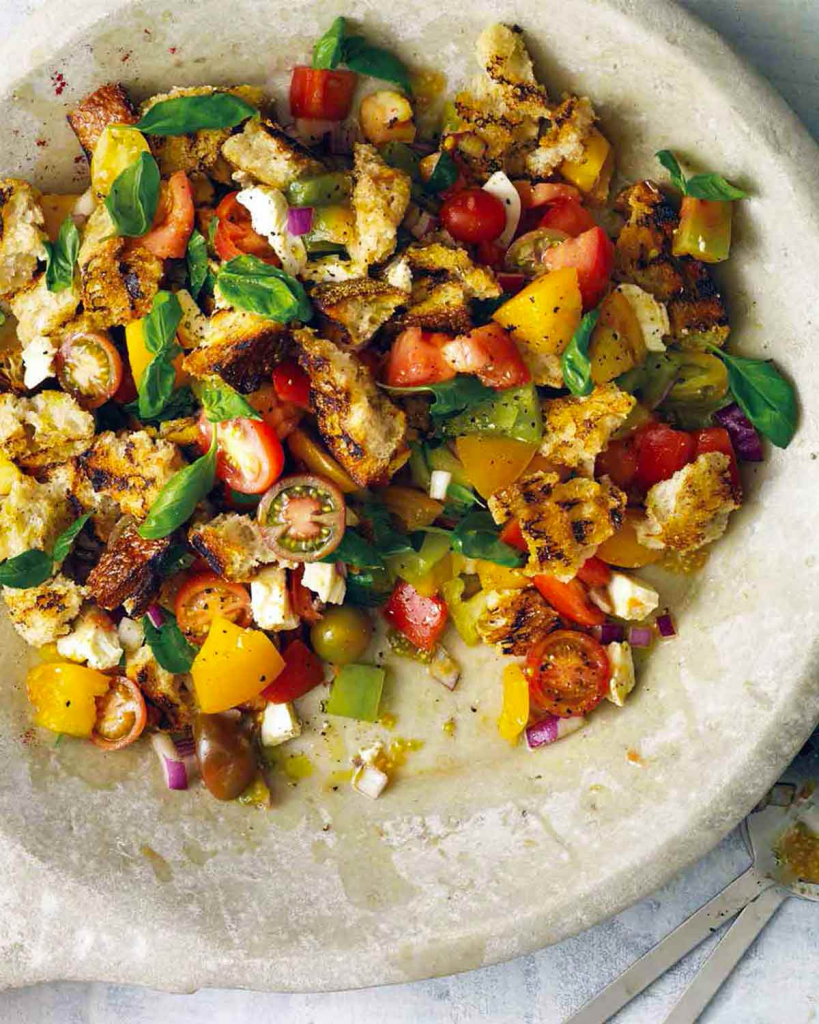
One of the benefits of so many of us working from home is that there’s more time to make a fancy lunch. This week I’ve enjoyed riffing on Panzanella themed recipes – you can adapt the one below to suit what you have in the fridge and the time you’ve got to make it.
Panzanella
Ingredients:
3 tbsp olive oil
Splash red wine vinegar
day old bread, cut into 2cm cubes
1 tsp salt
2 large, ripe tomatoes, cut into 2cm cubes
1 cucumber sliced 1cm thick
1 or 2 peppers cut into 2cm cubes
1/2 red onion, thinly sliced
20ish large basil leaves, coarsely chopped
3 tbsp capers, drained
Method:
Heat the bread either by pan frying in oil if you have time, or 30s in the microwave if not. Then mix thoroughly with all the other ingredients in a large bowl, season and serve.
Rob’s Recipe of the Week: Maintaining Courgette Enjoyment
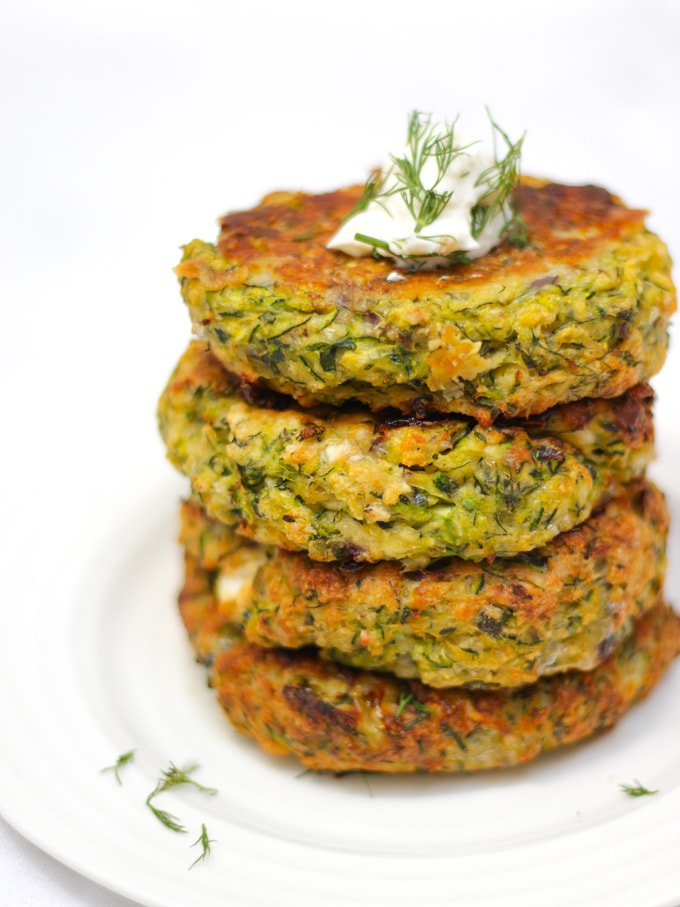
Every summer I treat the first courgette with excitement but as I’m sure is the case for everyone, my enthusiasm begins to wane as the summer goes on. To try and help with this myself and Rebecca have been trying out some more courgette recipes. My favourite so far is courgette fritters (sorry there’s a bit of a fritter theme at the moment!), they made for a reasonably quick work-from-home lunch.
Courgette fritters
Ingredients (8 fritters):
1 kg Courgettes Grated
100 g Feta cheese Crumbled into big chunks
2 Medium free range eggs
2 Cloves Garlic Peeled and crushed
15 g Fresh dill Chopped
15 g Fresh mint Chopped
1 tsp Dried oregano
75 g Plain flour
200 g Breadcrumbs
1/2 Red onion Peeled and finely chopped
Fry light spray or Olive oil for greasing
Method:
Preheat the oven to 220C
Take your grated courgettes and over a colander, squeeze out as much of the liquid as you can. Use the colander and your hands, there will be lots!
When you’ve squeezed out the liquid, put all of your courgette fritter ingredients into a large bowl and mix well with clean hands.
Shape into 8 patties and put onto a greased (or sprayed using Fry Light) baking sheet. I got the strongest shapes by compacting a firm ball and then squash down into a disc
Bake for about 30 minutes of until browned, firm and cooked through (I fried them instead to speed things up)
From: https://www.tamingtwins.com/courgette-fritters-recipe/
Rebecca’s Recipe of the Week: Seared Courgettes with Black Pepper and Cheese
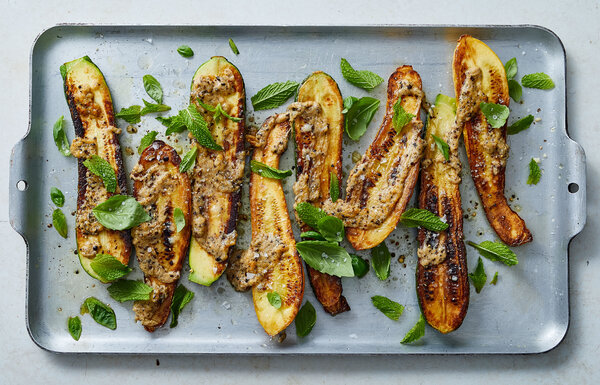
This week’s recipe is from Matt. He says: ‘This is really simple but very tasty way of cooking courgettes to their best’. It’s based on a classic Italian pasta dish called caccio e pepe, in which the pasta is dressed with grated cheese and lots of black pepper. That combination turns out to work equally well on courgettes.
This dish is delicious served with sausages, or some grains tossed with pesto, which, incidentally, is a further good use of the bountiful crop of basil we’re currently enjoying from Canalside.
Seared Courgettes with Black Pepper and Cheese
Serves 3-4
Ingredients
700g courgettes
3 tablespoons oil
Salt
2 teaspoons coarsely ground black pepper
4 tablespoons butter, cut into 4 pieces
50g hard cheese, grated
Handful of basil and/or mint leaves, torn into pieces
Preparation
Halve the courgettes lengthwise. If they are large, cut them into lengthwise quarters. Cut each length into 5-7cm sections. Sprinkle them with salt.
Heat the oil in a large, heavy frying pan for 2 minutes over medium-high heat. This will help you get a good sear on the courgettes. Once the oil shimmers, begin to sear the courgettes. You will need to do this in several batches so as not to crowd the pan—they need to be in a single layer. In batches, lay them cut side down in the hot oil and leave them undisturbed for 2-3 minutes, or until they begin to turn golden brown. Flip them over and cook for another 2-3 minutes on the other side, ensuring all sides are seared and golden brown. Remove them from the pan, setting them aside on a serving platter, and repeat with the remaining courgettes.
While the final batch cooks, add the pepper to a small saucepan and toast over medium-high heat for about 2 minutes, or until it becomes fragrant. Add the butter, which will quickly start to foam. Stir until the butter is melted and the foam subsides. Remove from the heat and quickly add the grated cheese. Stir vigorously, so the cheese doesn’t stick to the bottom of the pan. It will begin to melt, but will also cling together in pieces, which is the result you want.
Spoon the butter over the seared courgettes, making sure to include all the black pepper and melted cheese. Scatter the herbs over the top and serve.
Recipe adapted from NYT Cooking
Rebecca’s Recipe of the Week: Lebanese Tabouli
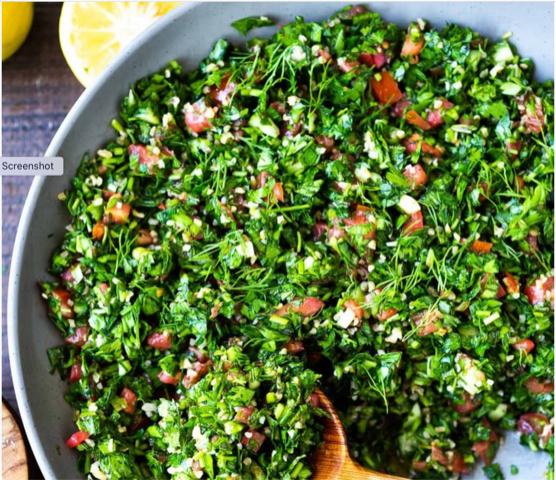
When I was growing up, tabouli formed part of my father’s very limited cooking repertoire, alongside steak tartare and chicken marsala. The recipe he used called it ‘non-lettuce salad’, and that’s a good description of this blend of parsley, mint, tomatoes, cucumbers and a little bulgar wheat. I dedicate this recipe to him!
The secret to this tabouli is the Lebanese 7-spice blend. For an absolute feast, serve it with Lebanese 7-spice chicken. It’s pretty good on its own, too.
Lebanese Tabouli
Serves 4
Ingredients
7 Spice Blend Ingredients
1 teaspoon ground coriander
1 teaspoon cumin
1 teaspoon cinnamon
1 teaspoon ground allspice
1/2 teaspoon grated nutmeg
1/2 teaspoon ground cloves
1/2 teaspoon ground cardamom
Tabouli ingredients
250ml dry medium grain bulgar wheat
4 spring onions
1 large bunch flat-leaf parsley
1 cup mint leaves
1 small bunch dill
3 medium tomatoes
1 cucumber
1 tablespoon lemon zest
70ml lemon juice, or to taste
125ml cup olive oil
1 teaspoon salt
1 teaspoon 7-Spice mix
Preparation
First prepare the 7-spice blend. This will make more than you need for the tabouli, but that shouldn’t be a problem since it’s so delicious. You can add it to lots of other things, including this splendid Lebanese 7-spice chicken. To make the blend combine all the ingredients together. If you want really to go to town with it, you can roast whole coriander and cumin seeds and then grind them, before combining with the other ingredients. This gives an added warm depth to the spice blend.
To make the salad, first prepare the bulgar wheat. Put it in a small bowl and pour 250ml boiling water over it. Cover with a plate, and set aside for at least 30 minutes while you prepare the rest of the salad. This allows the grains to soften.
Slice the spring onion and place in a large serving bowl.
Chop the parsley as fine as you can. It’s ok to include the thinner stems. Add to the bowl. Chop the mint and dill and add them as well.
Dice the tomatoes and cucumbers into small cubes and add them to the bowl, along with all their juices.
Add the lemon zest, lemon juice, olive oil, salt and 1 teaspoon of the 7-spice mix. Give it all a good stir.
By now 30 minutes have probably passed, so the bulgar wheat should be al dente. Once it is, add it to the salad as well and mix again.
If you have time, let the salad sit for a few hours to allow the flavours to meld. The parsley will soften and the bulgar will soak up the flavourful juices. It will in any event be very good the next day if there is any left over.
Before serving, give a stir and taste for salt, lemon and 7-spice. Adjust to your liking. Slyvie Fountaine, whose recipe this is, says ‘You want just the faintest whiff of the spices, like a whisper’.
Recipe adapted from Sylvia Fountaine, ‘Feasting at Home’. https://www.feastingathome.com/lemony-tabouli-aka-tabbouleh/
Rob’s Recipe of the Week: Swedish Summer Sandwich
This week’s recipe is a little niche if you stick to the vegan recipe, especially now that IKEA has closed in Coventry, but it can be adapted with other seafood flavours (the most obvious being actual seafood e.g. prawns). At worst, at least I’m giving you a quick and easy vegan mayo recipe… It’s another that I picked up in Sweden and is an adaptation of the dish “Skagen” which is a sort of seafood toast topper/sandwich filler (£6 for a baguette in the Volvo canteen ouch!). For a while it was my absolute favourite breakfast when combined with cucumber, salad and tomatoes all of which will be abundant in the shares over summer.
Vegan Skagen
Dry Ingredients:
- 1 jar Seaweed pearls (AKA veggie caviar, available at IKEA)
- Bunch of dill
- 1 pack of tofu, drained and squeezed as much as possible whilst maintaining solid chunks
Mayo:
- 100ml Soya milk (must be soya – I’ve tried with others but they refused to emulsify with the oil)
- 1 tbsn lemon juice
- 1 tsp mustard
- 200 ml oil (preferably rapeseed, other veggie oils work but again can have trouble emulsifying)
To serve:
- Toast
- Lettuce
- Tomato
- Cucumber
- Wedge of lemon (optional)
Method:
For the mayo, combine milk, lemon juice and mustard in a blender (handheld will do) before SLOWLY adding oil as a thin stream whilst blending on a fairly high speed. As you get to the end of the oil the mixture should thicken up to a mayonnaise texture.
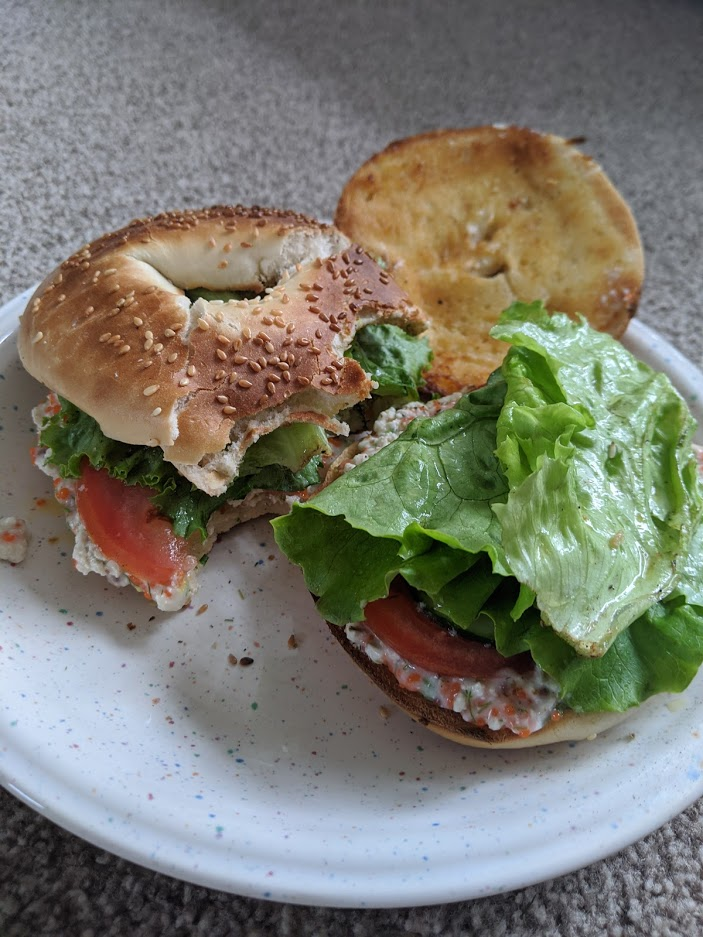
Then combine all ingredients in some Tupperware and serve with toast, sliced cucumber/tomato and lettuce. A lemon wedge is a nice addition if you have it.
Rebecca’s Recipe of the Week: Why Eat Normal Things When You Can Eat Weird Things?
A while ago I tried a recipe for whole broad beans cooked in a tomato sauce, and it was pretty good. It set me thinking whether you could actually cook the normally-discarded pods (husks?) that are left over when you shell broad beans. It turns out you can. I mentioned this to several friends, who variously told me I’d gone nuts, or that it sounded like the sort of thing people eat in Siberia. What can I say? I thought it was pretty good. We ate this with brown rice and a topping of salted yoghurt, and a shredded carrot salad on the side.
If you would like a normal recipe for broad beans, I strongly recommend this one: spaghetti with broad beans, bread crumbs and marjoram.
Broad Bean Stew
Serves 2
Ingredients
2 tablespoons olive oil
1 large onion, peeled and sliced
Salt and pepper
Leftover husks from about 500g young broad beans (that’s about 300g of broad-bean husks)
Juice of half a lemon
2-3 tablespoons fresh herbs (I used lemon thyme, sage, and dill)
½ cup water
Preparation
Heat the olive oil over low heat and add the sliced onion and a pinch of salt. Cook for 10 minutes, until the onion is soft but not brown.
Meanwhile assess the broad bean husks. You want bright, green, fresh-looking ones. Discard any that look discoloured. Remove any stringy bits along the sides, rather as you’d remove the strings from off the sides of runner beans. Cut the husks into 1-inch pieces.
Add the broad beans to the onions, stir, and cook for a minute.
Add the water, stir, cover, and simmer gently for about 15 minutes, or until the husks are tender. Top up with more water if it seems to be drying out.
Once the husks are tender, add the fresh herbs and lemon juice, and season with freshly-ground black pepper.
If you wish, you can also mix in some cooked broad beans, to make a double-broad-bean stew.
Serve on brown rice with a topping of salted yoghurt mixed with preserved lemon (if you happen to have any to hand).
Rebecca’s Recipe of the Week: A Very Elaborate Borscht
In case you have a little time on your hands just now, here is an excellent use of a few hours. The result is the best borscht I, at least, have ever tasted. Alissa Timoshkina, whose recipe this is, notes that if you can make the broth 24 hours in advance, ‘you will be rewarded with an even better tasting soup, but a few hours of resting will also do the trick’.
For the red cabbage sauerkraut, I recommend you get in touch with Canalside member Erica Moody, who makes superb sauerkrauts of all sorts.
Borscht
Serves 4
Ingredients
unrefined sunflower oil, for frying and roasting
1 large onion, finely diced
1 carrot, peeled and grated
6 raw beetroots
2 red peppers
2 tablespoons tomato purée
2 litres cold water
2 bay leaves
1 tablespoon black peppercorns
1 tablespoon coriander seeds
1 tablespoon fennel seeds
4 garlic cloves, peeled
bunch of dill
small bunch of flat leaf parsley
2 garlic cloves, grated
500g red cabbage sauerkraut
2 tablespoons pomegranate molasses
1 red onion
1 tablespoon brown sugar
400g can red kidney beans
2 teaspoons smoked paprika
4 tablespoons soured cream
salt
Preparation
Heat up a tablespoon of sunflower oil in a large pan and fry the onion and carrot for about 8 minutes until golden. Meanwhile, peel and grate 2 of the beetroots and core, deseed and thinly slice 1 red pepper. Add the vegetables to the pan together with the tomato purée and a splash of water. Season with salt to taste and fry for a further 5–8 minutes.
Top with the measured cold water, add the bay leaves along with the peppercorns and all the seeds, whole garlic cloves and half the bunches of dill and parsley. Season with a tablespoon of salt and bring to the boil. Reduce the heat, add the grated garlic and half the sauerkraut with its brine and simmer, covered, over a low heat for 40 minutes–1 hour.
Turn off the heat and let the borscht rest for another hour, while you prepare the rest of the elements.
So far, so good, but here is where the recipe starts to deviate from the norm quite a lot: to prepare the vegetables that will grace the plate and also add extra flavour and texture to the soup, you will need to do a bit of roasting.
Start by preheating the oven to 160°C fan/Gas Mark 4. Peel the remaining 4 beetroots, cut into wedges and dress with oil, salt and the pomegranate molasses. Peel the red onion, cut into wedges and season with salt and the brown sugar to bring out their sweetness and promote caramelization. Place on a roasting tray with the beetroot and roast together for 30 minutes. Drain the kidney beans, then dress them with salt, oil and the smoked paprika. Core and deseed the remaining red pepper, then cut into thin strips and dress with salt and oil. Roast the beans and pepper together, as they will need only 10–15 minutes.
When ready to serve, strain the broth through a sieve or a muslin cloth, discarding the solids. All we need is that rich broth! Reheat again if necessary. Next, create layers of texture and flavour in each bowl by adding a heaped tablespoon of the remaining sauerkraut to each, as well as a handful of roasted beetroot, onion, kidney beans and red pepper. Top each bowl with the hot broth and add a dollop of soured cream and a generous sprinkle of the remaining dill and parsley, chopped. The intensity of the flavours and textures of this dish is beyond words, while the look of the bowl will seduce the eye without a doubt.
Recipe from Alissa Timoshkina, Salt & Time: Recipes from a Russian Kitchen (2019).