Rebecca’s Recipe of the Week: Meera Sodha’s Roasted Carrot and Cabbage with Korean Chile Paste
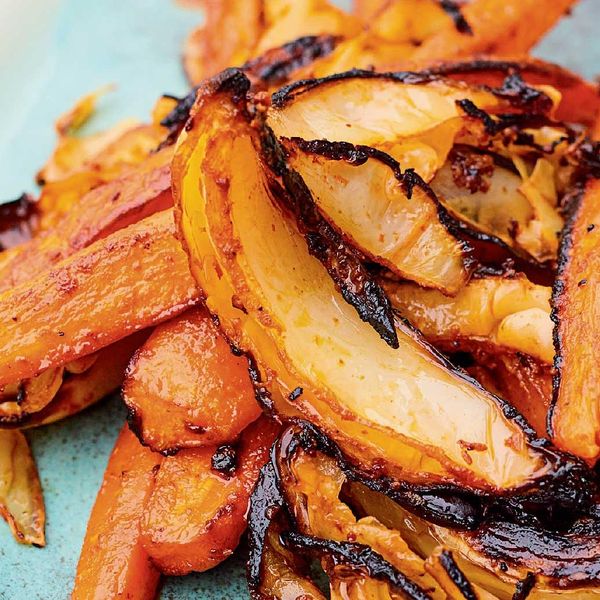
Gochujang, Korean chile paste, is warm and flavourful without being mouth-numbing. It adds a richness and complexity to roasted carrots and cabbage. The proportions of the two vegetables is not terribly important, and you might even want a bit more of the gochujang-cumin-ginger mixture. You could serve this with almost anything, from roast chicken to a potato pancake. It’s nice topped with yoghurt, too.
Roasted Carrot and Cabbage with Gochujang
Serves 2-4 as a side dish
Ingredients
750g carrots, peeled
750g white cabbage
3 tablespoons rapeseed oil
1.5 tablespoons gochujang paste
1 teaspoon ground cumin
1 teaspoon salt
4 cloves garlic, peeled and grated
3cm fresh ginger, peeled and grated
2 tablespoons more rapeseed oil
1 tablespoon white vinegar (I used rice wine vinegar; the original recipe calls for white wine vinegar)
Preparation
Preheat the oven to 220C. You will need two large baking trays and Meera Sodha recommends lining them with foil.
Cut the carrots lengthwise in half or quarters (depending on the size) to make long batons. Cut the cabbage into 2cm wedges. Place them in a large mixing bowl, or directly onto your two baking trays.
In a small bowl, mix the 3 tablespoons oil, gochujang, cumin, salt, garlic, and ginger. Pour over the vegetables and mix with your hands so that the marinade gets everywhere.
Spread the vegetables across the two trays. Make sure the carrots and cabbage are in a single layer, then bake for 35 to 40 minutes, until the vegetables are tender and blackened at the edges.
Meanwhile, put 2 tablespoons of oil and the vinegar into a large serving bowl. When the carrots and cabbage are roasted, transfer them to the bowl while still hot and toss them in the oil and vinegar and serve.
Recipe adapted from Meera Sodha, East (2019).
Rob’s Recipe of the Week: Victorian Salsify with Leeks
Salsify… I had no idea, but after a bit of googling and an interesting independent article / waitrose advert ( https://www.independent.co.uk/life-style/food-and-drink/salsify-root-vegetable-taste-recipe-what-is-it-waitrose-albert-bartlett-a8631251.html ) I’ve picked out a gratin recipe after realising that I’ve yet to make one this winter despite it being a weekly staple last year (that would be because I worked out how to make good oven chips instead!). I think this could be turned into a full meal rather than a side dish if you add sliced boiled potatoes and increase the quantities for the sauce and breadcrumbs.
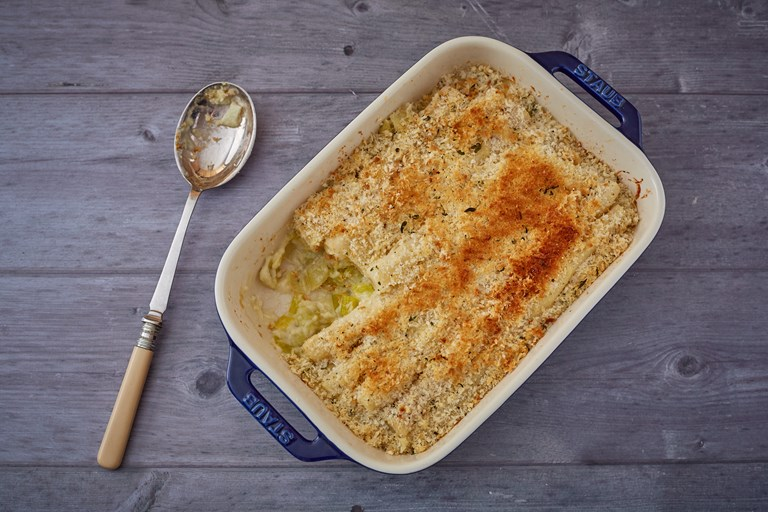
Leek and Salsify Gratin
Ingredients
SALSIFY
400g of salsify root
Lemon juice & water in a bowl
300ml of milk
1 bay leaf
LEEKS
330g of leek, washed and sliced into 1cm rings
20g of butter
olive oil
2 garlic cloves, sliced
SAUCE
40g of butter
40g of flour
1/2 tsp Worcestershire sauce, (optional – omit to make vegetarian)
1 tsp Dijon mustard
Tabasco, to taste
100g of mature cheddar, grated
salt
freshly ground black pepper
CRUMB TOPPING
20g of Parmesan, (swap for vegetarian hard cheese if preferred)
20g of Panko breadcrumbs
freshly ground black pepper
Method
Wash the salsify, scrubbing off any soil, then peel and trim the ends of each baton. Immediately place the peeled salsify into the bowl of lemon water to stop it from going brown
Bring the milk to the boil in a pan with a bay leaf and add the salsify batons. Simmer for 6–8 minutes until cooked al dente, then drain and set aside (reserve the milk for later)
Heat a splash of olive oil in a pan with the butter and sauté the leeks and sliced garlic until soft but not coloured
In a separate pan, make the cheese sauce. Melt the butter then stir in the flour. Cook until golden and slightly foaming, then slowly whisk in the warm milk reserved from poaching the salsify, continuously whisking to prevent lumps
Stir in the grated cheddar. Once melted and smooth, season with the mustard, Worcestershire sauce (if using), Tabasco, salt and pepper
Preheat the oven to 180°C/gas mark 4
Trim the salsify to the size of the ovenproof dish you’ll be using. Roughly slice any trimmings and add to the pan with the leeks
Pour ¾ of the sauce into the leeks and stir to combine, then transfer to an ovenproof dish
Place the trimmed salsify into the remaining sauce and stir to coat. Neatly arrange the salsify on top of the leeks
Mix together the ingredients for the crumb and sprinkle evenly over the salsify. Bake for 25–30 minutes until golden and serve
Taken from: https://www.greatbritishchefs.com/recipes/leek-and-salsify-gratin-recipe
Rebecca’s Recipe of the Week: For the man who doesn’t like kale
Here is an excellent topping for punchy vegetables such as kale. The key ingredient is fresh turmeric root, which you can get at Gaia, on Regent Place in Leamington, and doubtless elsewhere. You whizz up the turmeric with cashew butter, the juice of a few of the clementines you have hanging around from Christmas, and a bit of mustard.
The original recipe (from The First Mess) combined this with raw, shredded Brussels sprouts, toasted sesame seeds, sliced spring onions and fresh dill to make a very good slaw but I think this will go well on top of anything in the brassica family. This recipe is dedicated to the nice person at Canalside just before Christmas who swapped his unwanted kale for my unwanted rosemary.
Super Turmeric Sauce
serves 2
Ingredients
2 tablespoons cashew butter
2 teaspoons Dijon mustard
juice of 3 clementines
2 inch piece of fresh turmeric, peeled
5 tbsp olive oil
Preparation
Combine the ingredients in a blender and whizz until smooth.
Recipe adapted from The First Mess, where you can find the recipe for the Brussels sprouts slaw, and also a salty maple-roasted squash and ginger rice which goes very well with it.
Rob’s Recipe of the Week: Balsamic Brussel Sprouts
It seems like every sprouts recipe in existence starts with “sprouts are now one of my favourite christmas foods…” but however cliche it is, I agree since I started experimenting with different ideas. In past years I’ve used Jamie Oliver’s squashed brussels recipe but this year I want to keep it veggie so I’ve gone for the recipe below. I might experiment with boiling, frying and squashing the sprouts before the roast as per the Jamie recipe though.
Maple Balsamic Sprouts
Ingredients:
4 cups (350g) Brussels sprouts, halved
2 tablespoons olive oil
1/2 red onion, thinly sliced
2-3 garlic cloves, minced
1 teaspoon dried rosemary
salt and pepper, to taste
1/3 cup (40g) hazelnuts, roasted chopped
Maple Balsamic Glaze
3 tablespoons balsamic vinegar
2 teaspoon maple syrup
Instructions
Preheat the oven to 220 C
Wash and half the Brussels Sprouts and toss them with oil, onions, garlic, rosemary, salt, and pepper. Spread onto a baking sheet in a single layer and bake for about 30 minutes, stirring occasionally, until browned on the outside and tender on the inside.
Stir together balsamic vinegar and maple syrup and set aside.
Remove from oven and toss with hazelnuts and maple balsamic glaze.
Serve warm.
Taken from: https://www.mydarlingvegan.com/maple-balsamic-brussels-sprouts-with-hazelnuts-and-rosemary/
Rebecca’s Recipe of the Week: Golden Pumpkin Curry
This is an absolute flavour bomb. The combination of onion, spice and pumpkin is delicious, fresh and complex, with a savoury depth that you will savour. Serve with rice, and a garnish of fresh coriander, if you like, for a little touch of green.
If you want to make this vegetarian, you can apparently replace the fish sauce with an equal amount of Japanese miso, but I used fish sauce
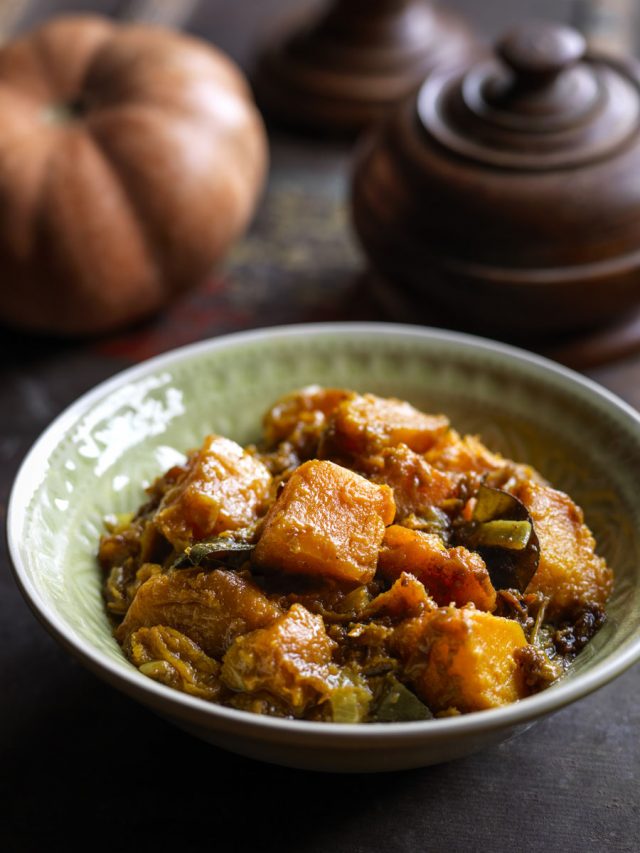
Burmese Golden Pumpkin Curry (Shwe Hpayone-thi Chet)
Servings 2 as a main
Ingredients
100 ml rapeseed oil or other neutral-tasting oil
2 teaspoon ground turmeric
2 teaspoon ground coriander
2 teaspoon ground cumin
2 teaspoon paprika
16 fresh or dried curry leaves
3 medium onions, sliced
3 spring onion, green and white parts, shredded
4-6 garlic cloves, sliced
3 cm piece of ginger, peeled and grated
1 small squash or pumpkin, peeled and cubed
1 tablespoon sugar
4 tablespoons fish sauce
Instructions
Heat the oil in a saucepan over a high heat. Add the turmeric, coriander, cumin, paprika and curry leaves to the oil and allow to sizzle for a few seconds.
Now turn the heat down to medium and add the onions, spring onion, garlic and ginger and fry for 10 minutes, until fragrant and the onions have wilted and some have crisped up.
Add the squash, sugar, and 300ml of water. Stir well. Cover and cook for 25 minutes, or until the squash is tender. Add the fish sauce, stir again and serve with rice.
Recipe adapted from Mimi Aye, Mandalay: Recipes and Tales from a Burmese Kitchen (2019).
Also available online at https://www.kaveyeats.com/2019/11/mimi-ayes-golden-pumpkin-curry.html
2019 – December news: The Final Straw
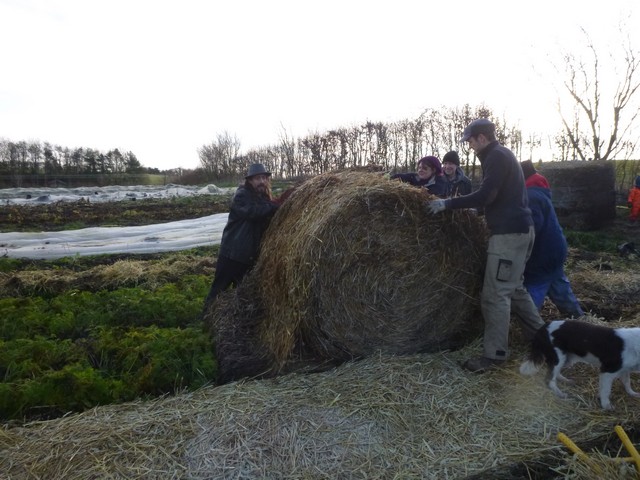
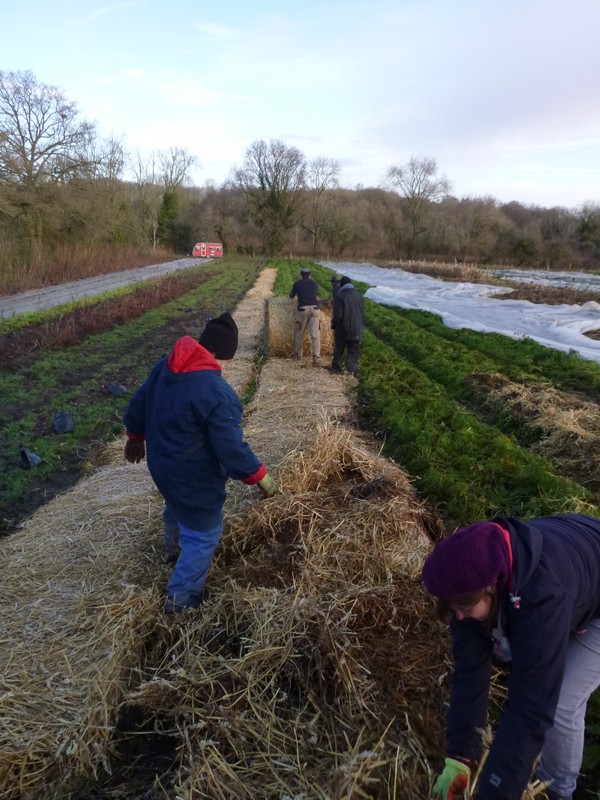
Dom says, “One of my favourite jobs in the yearly calendar is covering up our carrots with straw to protect them from the worst of the winter frosts. Volunteers and growers tackled this job with relish on Wednesday, rolling some big bales down the field with the usual thrilling risk that some of them might gain momentum and end up in the canal (bales, not volunteers). “
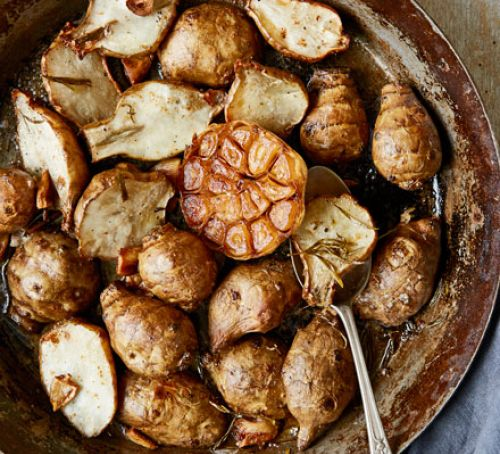
Rob’s Recipe of the Week: Crispy artichokes
I don’t think I’ve ever eaten a Jerusalem Artichoke before, but they’re coming in the share next week! After a bit of searching around it seems like roasting is the most common way to eat them and this recipe sounds like a good introduction. Anyone who’s had them before please feel free to suggest other ideas!
Ingredients (scalable)
- 800g Jerusalem artichokes
- 1 garlic bulb, cut down the middle
- 1 tbsp rosemary leaves, chopped
- 3 tbsp rapeseed (or other) oil
- pinch ground mace (Comes from nutmeg shells, so I will probably just substitute nutmeg)
- 20g butter
- 2 tsp lemon juice
Method
Heat oven to 180C/160C fan/gas 4. Soak the artichokes in cold water for 20 mins or so to loosen any dirt, then scrub them with a scourer, being sure to remove any grit. Halve the small ones and quarter the bigger ones, and put them in a roasting tin with the split garlic bulb and rosemary. Coat everything with the oil and season. Roast for 45-50 mins until tender inside and crispy outside.
To finish, squeeze the softened garlic cloves from their skins and toss with the roasted artichokes, along with the mace, butter and lemon juice.
Taken from https://www.bbcgoodfood.com/recipes/crispy-jerusalem-artichokes-roasted-garlic-rosemary
Rebecca’s Recipe of the Week: Parsnip and potato gnocchi with gochujang and hazelnuts
Another brilliant recipe from Meera Sodha: crispy homemade gnocchi tossed with greens and served with spicy Korean chile sauce. Gnocchi can be a little stodgy; the solution is to fry them briefly after they’ve been boiled, so the crunchy outside contrasts with the soft, pillowy inside. A simple red sauce of Korean chile paste, miso and sesame oil provides the perfect foil.
If you don’t know gochujang chile paste, you’re in for a treat. Get some at the KW Oriental Supermarket on Bath Street, or (I suppose) in major supermarkets everywhere.
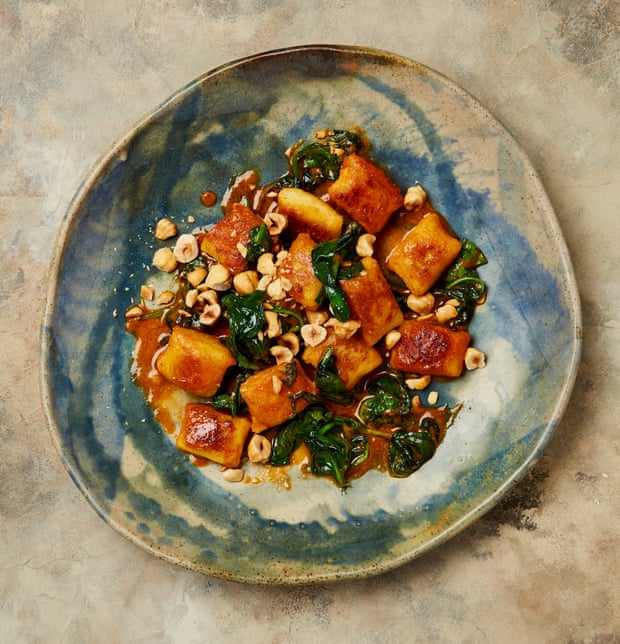
Parsnip and potato gnocchi with gochujang
Serves 2
Ingredients
250g potatoes
150g parsnips
60-100g ‘00’ flour
2 tbsp rapeseed oil, for frying
100g young spinach
25g toasted hazelnuts, chopped
for the chile sauce
4 tsp gochujang paste
4 tbsp white miso
3 tbsp toasted sesame oil
2 tbsp fresh lemon juice
Method
Put the potato and parsnips in a medium saucepan, cover with cold water and bring to a boil. Turn down to a simmer and cook until tender (15-30 minutes, depending on the size).
While the potatoes are cooking make the sauce: combine the sauce ingredients in a small bowl and mix until smooth. Set aside.
When the potatoes are tender, drain and leave to steam dry for 15 minutes. Peel and then mash until very smooth. If you have a potato ricer, this is a good moment to use it.
Add the flour to the mashed/rice potatoes and parsnip, and, using your hands, gently mix it in to form a dough. Add as much flour as you need to stop it sticking to everything, but try not to add more than that. Tip out on to a clean work surface sprinkled with a bit more flour and knead a bit to form a smooth dough.
Divide the dough in two and roll each piece into a sausage around 35cm long x 2cm thick. Cut each sausage into 2cm pieces. If you have the energy, you can use a fork to give each piece some little ridges, which will be cute and make the sauce stick a bit more to the gnocchi. To do this, roll each piece across the tines of a fork, indenting parallel ridges into the individual gnocchi (gnoccho?).
Bring a big pan of water to a rolling boil, drop some of the gnocchi in and and cook for one to two minutes, until they float to the top. Lift them out with the slotted spoon as they rise to the top and and drain in a sieve. Continue until they are all cooked.
In a medium frying pan, heat the rapeseed oil, swirling the pan gently so it coats the base. Once hot, add some of the gnocchi and fry for a couple of minutes, until golden brown underneath. Flip them over and cook for another couple of minutes, to brown the other side. Remove from the pan and then cook any remaining gnocchi.
Add the spinach to the pan and stir gently (so as not to break up the gnocchi) until it wilts. Return any remaining gnocchi to the pan and toss together.
Divide onto two plates and drizzle with a couple of tablespoons of the sauce. Sprinkle with the hazelnuts and serve with extra sauce on the side.
Recipe adapted from Meera Sodha, The Guardian, 23 Nov. 2019.
2019 – November news: Bird on a Wire
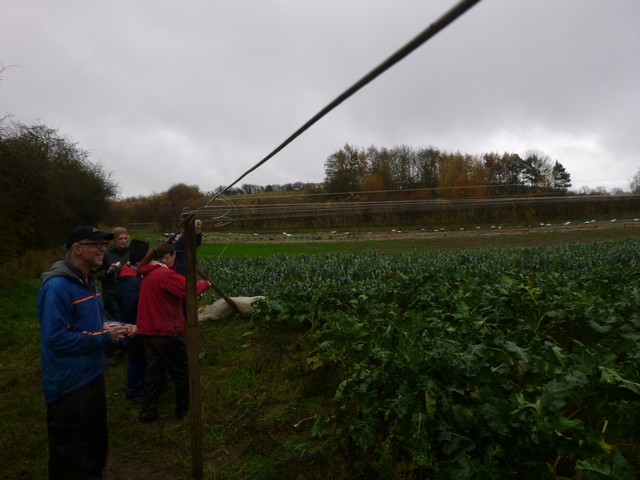
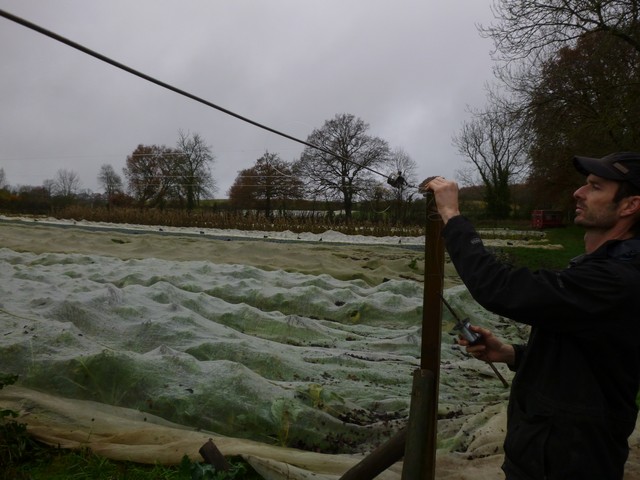
This is the week when we go through the annual ritual of taking the mesh off our purple sprouting broccoli crop (the fabric damages the emerging sprouts) and fix long lines of fishing wire above the plants, to keep the pesky pigeons off. It sounds strange but the technique works a treat (the birds are simply unable to settle on the crop to feed), at a time of year when they can really massacre your brassicas as other food sources dimish.
Rob’s Recipe of the Week: Hip Turnips
Turnips are one of the things I find it hardest to find recipes for. Luckily it seems they are gaining a “hip status” over in New York, so I’ve found a few recipes from Bon Appetit (If you like cooking shows I recommend their youtube channel, especially “It’s Alive” with Brad). I’ve no idea how this one will turn out but I look forward to trying it!
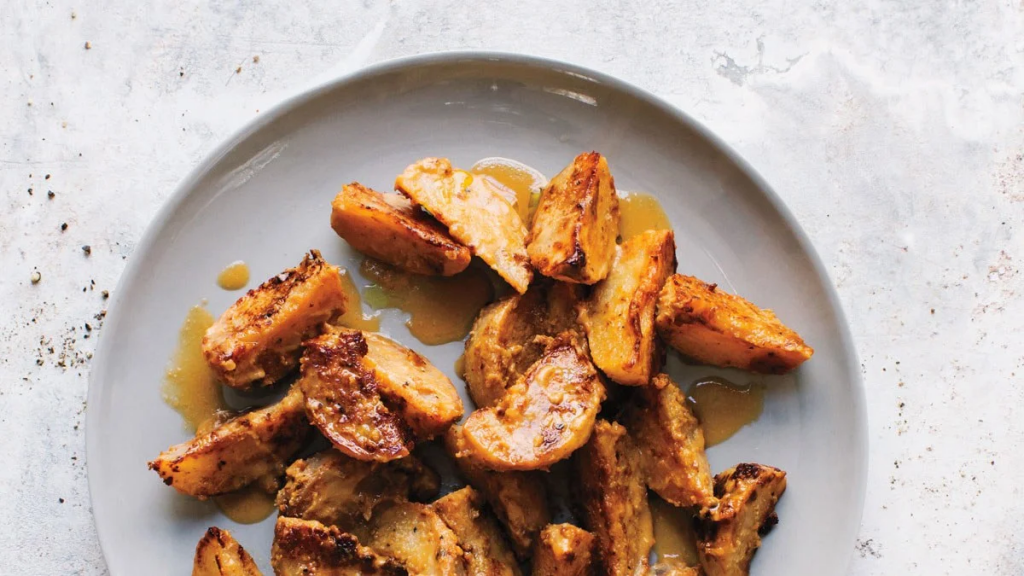
Miso-glazed turnips
Ingredients:
1 pound (450g) turnips trimmed, scrubbed and cut into 2cm wedges
2 tablespoons white miso (near the spices in supermarkets normally)
2 tablespoons unsalted butter
1 teaspoon sugar
2 tablespoons lemon juice
salt and pepper
Method:
Combine turnips, miso, butter, and sugar in a medium skillet/pan, then add water just to cover vegetables. Season with salt and pepper.
Bring to a boil over medium-high heat and cook turnips, turning occasionally, until they are tender and liquid is evaporated, 15–20 minutes.
Once all the liquid has cooked off, keep cooking turnips, tossing occasionally, until they are golden brown and caramelized and the sauce thickens and glazes the vegetables, about 5 minutes longer.
Add lemon juice and a splash of water to pan and swirl to coat turnips. Season with salt and pepper.
Taken from:
https://www.bonappetit.com/recipe/miso-glazed-turnips
as part of a wider set of recipes:
https://www.bonappetit.com/recipes/slideshow/turnip-18-recipes-underrated-root-vegetable
